
How to Take Self-Portraits at Home (Create Your Own Home Studio)
No studio, no problem!
In this week’s article, we’re going to look at how to take self portraits at home, without expensive gear, fancy backdrops and studio lighting.
I myself actually don’t work in a studio:
Yes, I do have some professional studio flashes and a few backdrops that allow me to turn my living room into a photo studio.
But aside from that, I primarily use inexpensive tools and DIY solutions (which I will introduce later in the article).
Of course, having access to a fully equipped photography studio makes the process a whole lot easier.
However, there are many reasons why this may not be an option for you; it may be too expensive, not accessible in your area or simply too complicated.
Luckily, you don’t need to let this stop you.
No Fancy Gear Required
In photography, just like in many other disciplines, fancy tools don’t make a great artwork.
What matters is the intention behind your image and the message you want to convey.
Expensive gear is great, but absolutely not required for your creative self portraits at home.
The only thing you need is the willingness to experiment and, most importantly, to have fun.
In today’s blog post, I will share how your home can serve as a DIY studio space and what lighting options you have.
I will also talk about additional accessories and finally give you some creative ideas for self portrait photography at home.
Let’s dive in!
(Just so you know: This post contains affiliate links. As an Amazon Associate I earn from qualifying purchases).
1. Your DIY Studio Space: Create a Photography Studio at Home
You really don’t need access to a photography studio.
I take all my photos in my crammed living room, moving everything out of the way and then putting it back after each shoot.
Not practical, but it’s the best option at the moment regarding convenience and cost-efficiency.
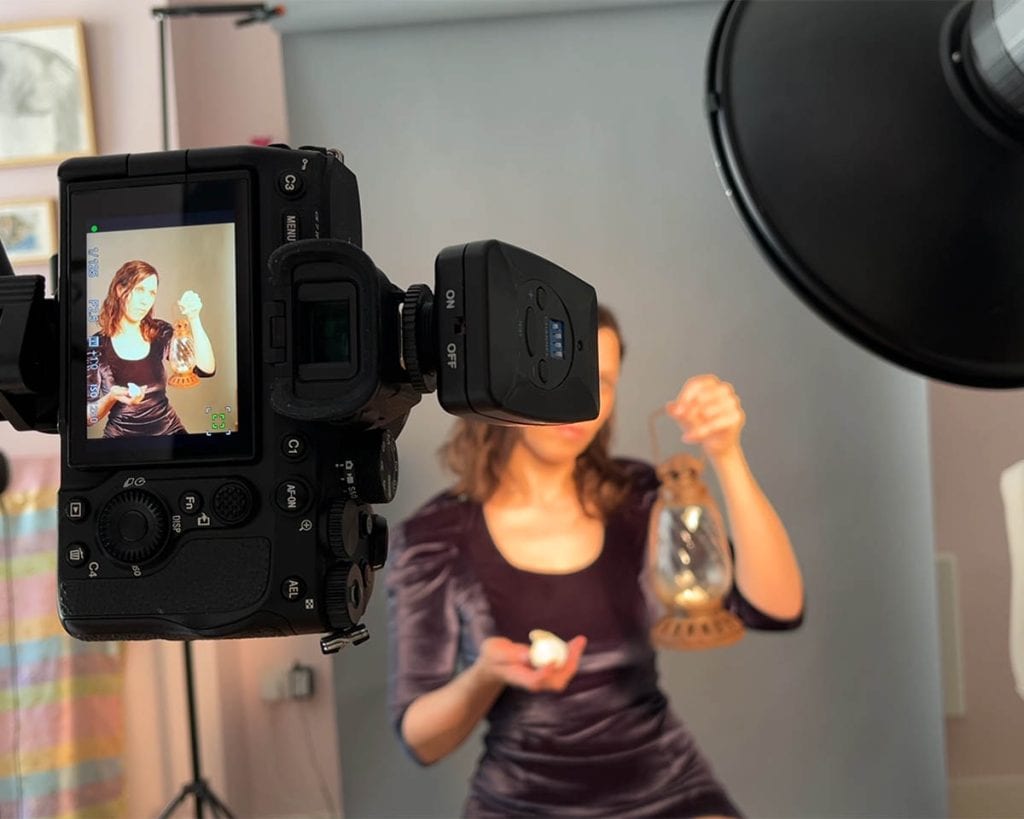
Me, taking self portraits in my living room.
Let’s talk about the different elements you have to consider when you want to take self portraits at home.
Lighting
Without light, there’s no photograph.
In a studio, you can create any lighting situation you want–harsh flash, soft flattering light, and so on.
When you’re taking self-portraits at home, you don’t have that luxury, so you’ll want to use what you have available.
In most spaces, that will be a window.
Window Light
Window light is one of the most beautiful types of lighting, so this is not a bad option at all.
Here’s an example of a window light portrait:
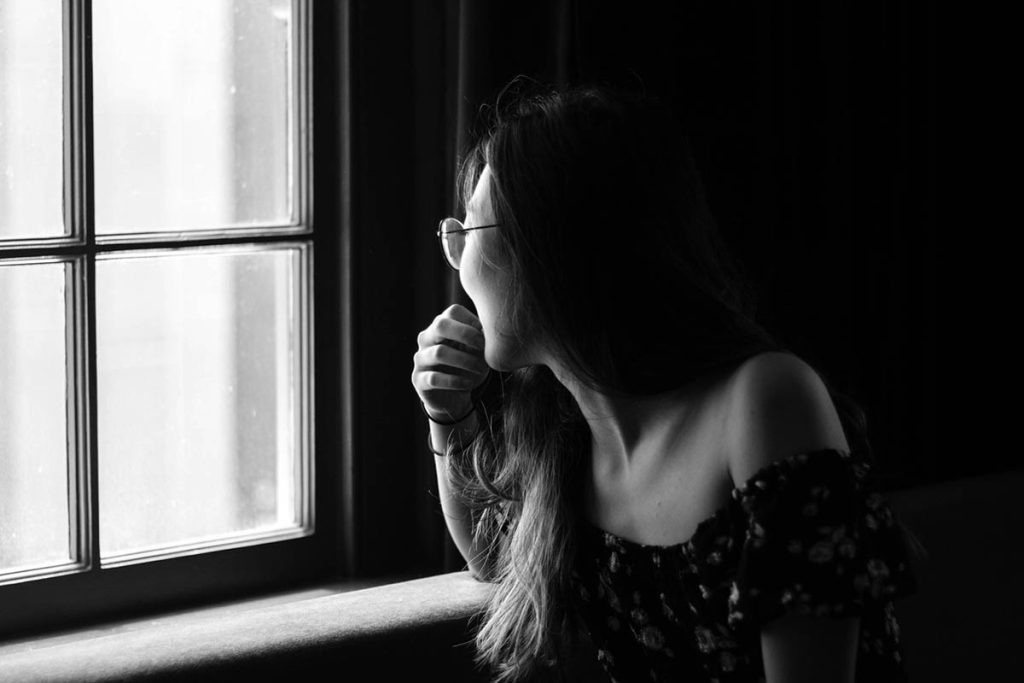
Window light portrait. Image credit: Jacky Zeng.
The one disadvantage of window light is that you depend on natural light, so you have to take your photo at a specific time of day.
Also, pay attention to the weather as this will influence what effect you get.
If you want to use the window as a gigantic softbox for the most gorgeous portrait lighting, shoot during a cloudy day–you don’t want any direct sunlight for this.
The clouds act as a diffuser, making the light soft and thus more flattering.
For this type of even lighting, it’s best to use a north—or south-facing window, as the lighting will be more even throughout the day.
If you want a more dramatic look, use an east or west-facing window:
These windows provide more direct light during sunrise and sunset.
By the way, you don’t need to restrict yourself to daylight only–you could use light falling into the window at night.
Look at this example of a self-portrait I took in Riga, Latvia, using light from streetlamps only:
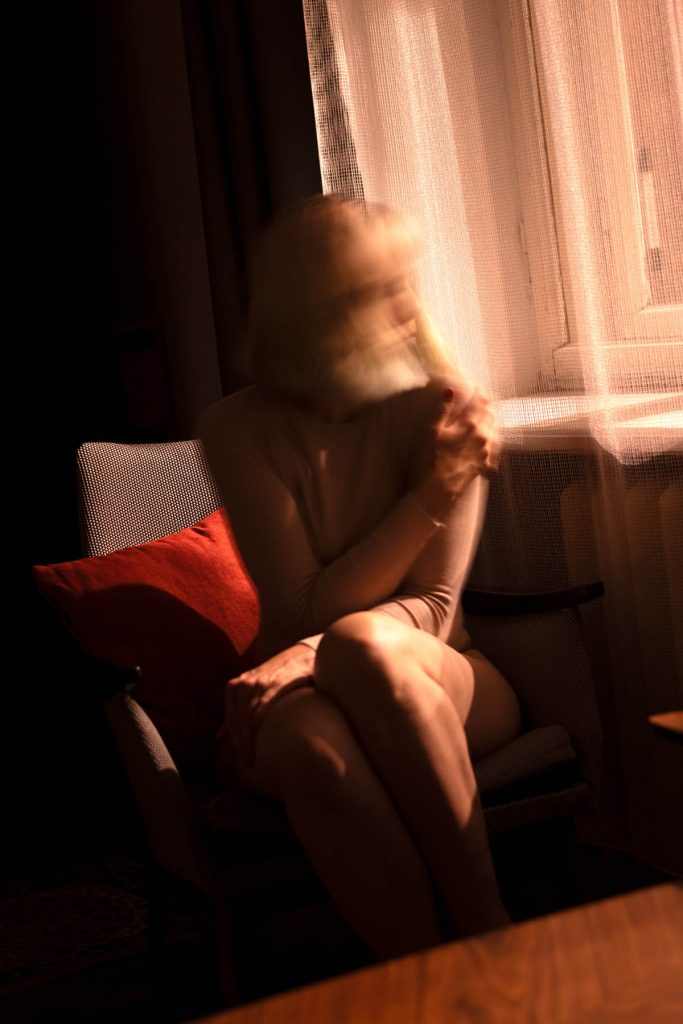
More Tips for Using Window Light
Here are some things to remember when using windows as your light source:
- The larger the light source (i.e. the window), the softer the light. Use a small window for distinctive shadows and harsher light.
- Play with position: Closer proximity to the window creates more contrast. If you want more even lighting, step a little further away from the window.
- Shoot with the window behind you for a dramatic silhouette effect.
- If you’re standing sideways to the window and want to brighten the shadow areas in your face, use a piece of white foamboard/cardboard as a reflector.
- Unless you want to mix light sources, it’s best to remove all other light sources, i.e. switch off the ceiling light, any desk lights, etc.
Before I get to the next section…did you know you can download my free self portrait photography ebook? More info below:
Free Ebook-50 Self Portrait Photography Ideas
Do you love self-portrait photography, but lack inspiration for your shoots? Then download my e-book with 50 ideas for self-portrait photography!

…but now, back to the blog post!
Other Light Sources
If you don’t want to use window light, or you don’t have a suitable window in your flat, you can absolutely use artificial lighting, too.
In fact, I’ve found that using lamps you already have in your home, such as bedside lamps, floor lamps, desk lamps, etc., can result in really beautiful, moody portraits.
You could even use candles or fairy lights for a more dreamy or ethereal effect.
Obviously, this doesn’t work if you want to take evenly, brightly lit self-portraits, but it’s a fantastic option for dramatic, cinematic self-portraits like this one:
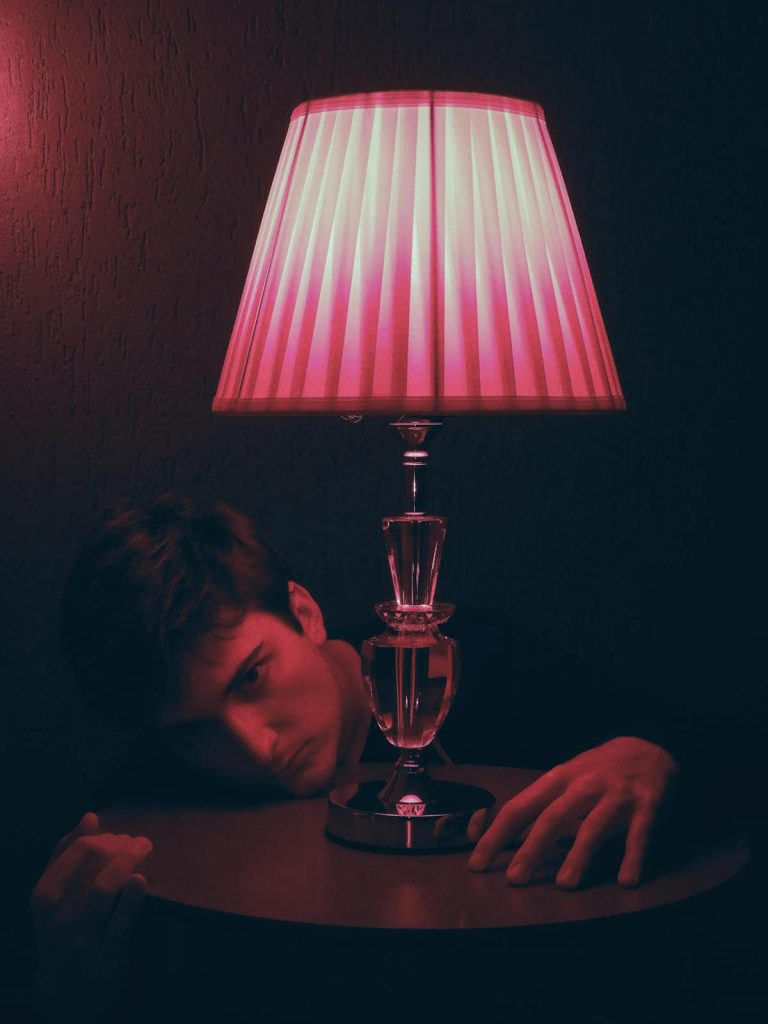
Image credit: Renan Martini.
You can get really creative and play with this low-light effect.
For example, you can light only a part of your face for more impact or use a few small light sources to create atmosphere in your self-portrait.
Another really fun, inexpensive option is a sunset lamp.
These usually come with a remote that lets you change the colours, and they create really interesting, atmospheric light.
Buy a sunset lamp here.
Camera Flash
Let’s not forget that most cameras have an in-built light source–an on-camera flash.
Although this may not be the first option for evenly lit commercial portraits, it can be an excellent tool for creative self-portraits.
If you find the flash a bit too harsh, you can cover it with white translucent plastic, white nylon or white tissue paper to diffuse the light and make it more flattering.
On-camera flash is definitely not for everyone, but it can give your images an edgy look reminiscent of fashion photography and is absolutely worth experimenting with.
I’ve actually written an in-depth post about creative flash photography, which you can find here:
Mastering Creative Flash Photography for Portraits & Self-Portraits
Light Modifiers
Finally, let’s talk about light modifiers–this is where you can really achieve a lot with very little.
First, what do I mean by light modifiers?
Well, sometimes you want to manipulate your light source to achieve a different effect.
In a professional studio, this would be done with tools such as softboxes, umbrellas, beauty dishes, honeycomb grids or flags.
Below is a photo of two softboxes being used in a studio:
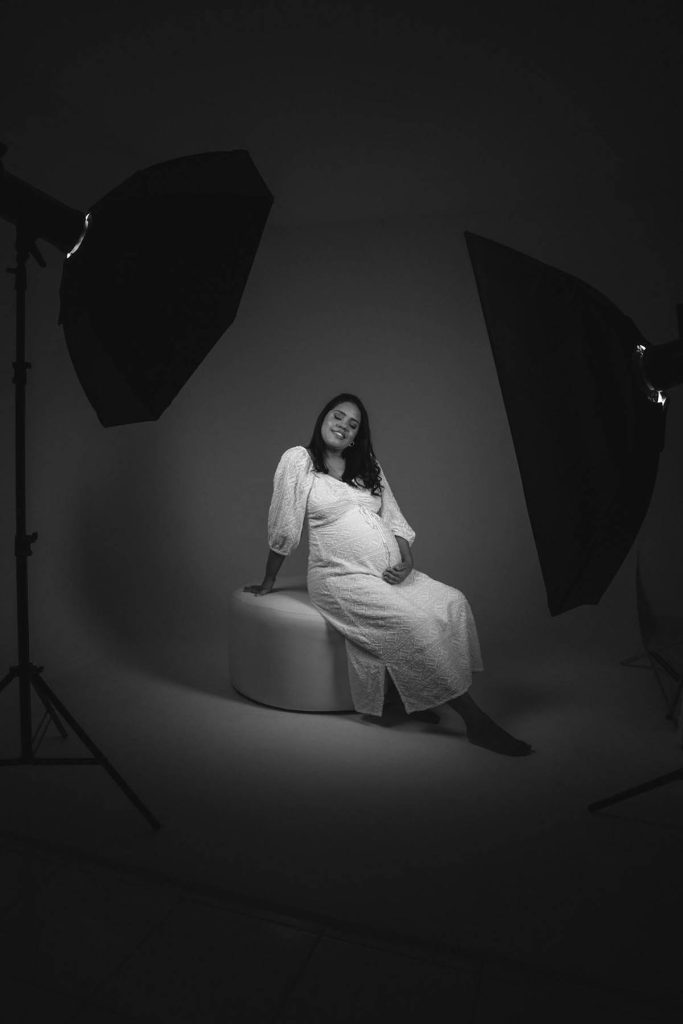
Image credit: Jonathan Borba.
Generally, I would divide these tools into three categories:
- light-diffusing tools that make the light softer and more flattering–ideal for giving your self-portraits a more professional look
- light-shaping tools that give light a particular shape, like a snoot (a cone-shaped metal piece), which concentrates the light into a very narrow beam
- light-restricting tools that minimise light or block it from reaching certain areas, such as honeycomb grids, black fabric, etc.
Let’s look at which DIY solutions are available for each of these categories.
For light-diffusing tools, you’ll want to use translucent white materials that evenly distribute the light.
The material should be placed in front of your light source, be it a window or a lamp you’re using.
You can try shower curtains, white tracing paper or white parchment paper, which is particularly great as it’s heat resistant.
(Whichever material you use, be careful with hot lights–test the material before and don’t place it too close to your heat source).
You can also use white synthetic fabrics, particularly nylon, but again, be careful about heat exposure.
If you don’t mind getting crafty, you can actually make your own softbox using cardboard and one of the above materials; you can find lots of tutorials for this on YouTube.
For light-shaping tools, you can experiment with different cardboard tubes.
For example, I once created a directional light source by taping a cardboard tube around a flashlight head.
Make sure to use lights that don’t generate heat if you’re using cardboard (like LED lights).
If you want to create a custom shape, you can use foil to craft a cone-shaped snoot and spray paint it black or use black wrap, a special gaffer foil you can buy online.
I promise to keep this blog completely ad-free so you can read without distractions. If you want to support my work, buy me a coffee: It’s a small gesture that makes a big difference!
For light-restricting tools, the easiest way is using black fabric–simply hang it in areas where you don’t want the light to reach.
Similarly, use black foamboard or other stiff materials to prevent light spill in certain areas and block the light.
You can use clothes pegs or clamps to attach the board to a tripod, a chair or whatever else you have standing around.
With light-modifying tools, simply use common sense:
Black absorbs light, while white lets it shine through.
Therefore, place white and black items depending on the effect you want to achieve.
To complete your lighting kit, you can use homemade reflectors, which are used to brighten up shadows.
For example, you could use a reflector when taking a self-portrait next to the window, standing sideways.
In that position, only the window-facing half of your face will be lit.
To make the light more flattering on the other half, you can hold the reflector in your hand, attach it to a tripod, or use a similar item to bounce the light from the window back onto the lesser-lit side of your face.
Professional reflectors are actually very inexpensive; I use a collapsible 5-in-1 reflector like this:
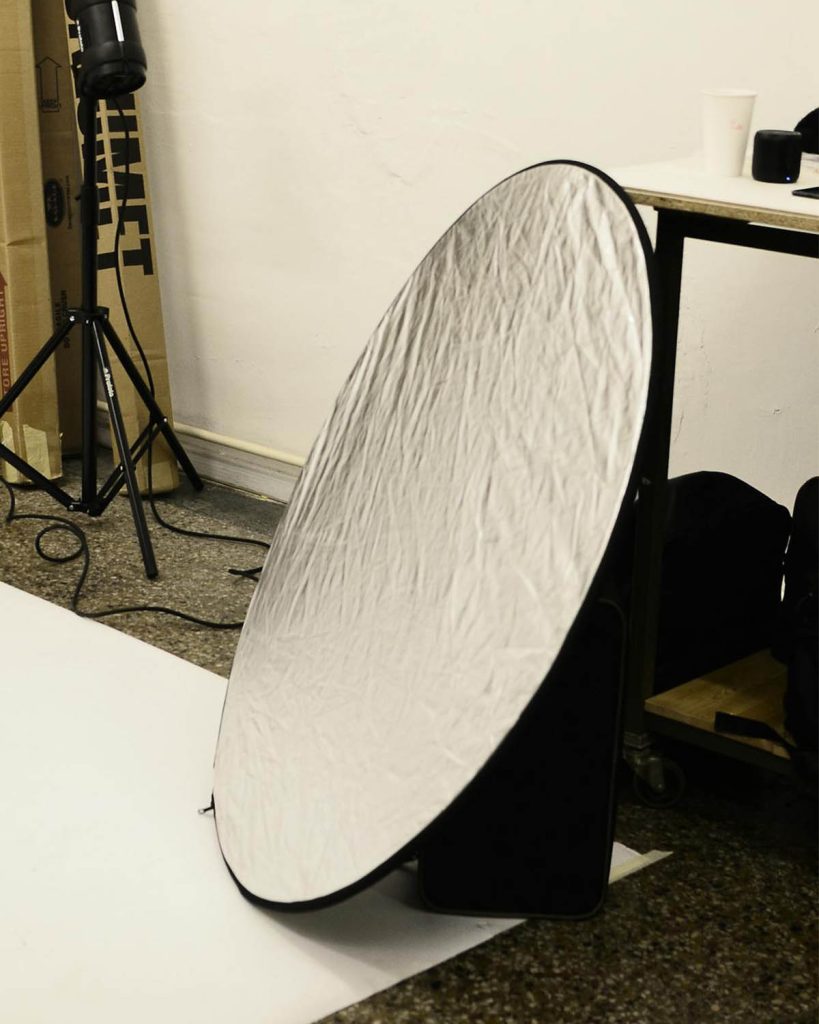
Image credit: Skylar Kang.
Buy a collapsible reflector here.
2. Setting up Your Studio Space
After that whopper of a topic out of the way, let’s quickly talk about your actual “studio space”.
If you want a plain background, you can hang curtains, fabric leftovers, bedsheets, rugs, or any other textiles you have at home behind you.
Attach them with clothes pegs or inexpensive spring clamps.
However, it’s also worth working with what you have—after all, your living space is unique and will provide many opportunities for interesting pictures.
You can use the whole room or take close-up self-portraits on an interesting chair, in your bed, in the kitchen, etc. I’ve even taken one in the shower once!
Interesting wallpapered walls, spaces with artwork on the walls, and surfaces with textures such as marble or stone make particularly great backdrops.
What Camera to Use for Your Self-Portraits at Home
Next, some thoughts on cameras.
I personally use a mirrorless full-frame camera, but that’s really not required.
You could also use a phone camera, a film camera, or even a disposable camera. The only prerequisite is that your camera has a self-timer.
(For an in-depth guide on which self-portrait camera to buy, check out this post:
Best Camera for Self-Portrait Photography: My Top Picks for Beautiful Shots
Tips for Taking Your Self-Portrait
If you’re using a relatively modern camera, you can connect it to a phone app to take your picture.
For older models, you will have to either use a remote trigger or set the self-timer and quickly get into the frame.
Here’s one of my previous articles on the technical process of taking self-portraits.
If you’re using a phone, you can also use the self-timer function.
On my iPhone, for example, you can choose between 3 and 10 seconds.
Make sure you use the lens on the back of the phone, not the selfie camera on the front, as the latter will provide better quality.
In terms of setting up the camera, I do use a tripod, and if you have any spare cash, I would recommend investing in one as it makes things so much easier.
However, you can also get by without one–prop up your camera or phone against a stack of books or other objects and place a rolled towel or piece of cloth under the lens to stabilise it.
3. Ideas for Self-Portraits at Home
Right, now it’s finally time to take some self portraits!
If you’re stuck for ideas, here are some suggestions:
- Take a few minutes to think about how you’re feeling today, then try to portray that emotion in your image.
- Experiment with different lighting effects, see section about lighting above: Use only a small bedside lamp or table lamp for a cinematic effect, use a harsh flash for an edgy fashion look, cut slits through cardboard and place it in front of your light source to create the illusion of a window shutter, create a small directional light and direct it at your eyes, mouth/other features only, shoot through different coloured fabrics, etc
- Use a mirror and play around with the reflection
- Make it abstract by shooting ultra close up or shooting only certain parts of your face/body
- Use materials in front of your camera lens–try crystal glass, prisms, a pair of tights, etc
- Shoot a series of yourself in the style of documentary photography, i.e. a day in your life
- Use interesting props such as flowers (read more about this here)
- Become a different character by dressing up with items from your wardrobe/someone else’s clothing/accessories
- Play around with slow shutter speed if your camera allows this–use a very slow shutter speed to create motion blur or ghostly effects
- Create a silhouette effect by placing a bright light source behind you
- Shoot your hands only
- Go for a monochrome look, for example wearing make up and clothes in one particular colour in front of a backdrop in the same colour.
For more self portrait ideas, have a look at this blog post:
Self Portraits Photography Ideas: 21 Creative Self Portrait Projects
And that’s it for today’s post! I hope you find it helpful.
P.S.: Do you want to become an expert at self portrait photography? Then check out my in-depth guide below:
My Ebook: The Self-Portrait Guide!
Would you like to learn more about self-portrait photography? Then check out my ebook now! Topics include:
- how to use natural and artificial lighting
- essential gear you’ll need for self-portraits at home
- idea-finding techniques to develop concepts for photo shoots
- how to edit, export and print your images, and more!
