
Art Portrait Photography: How to Capture Artistic Portraits
When looking at artworks of master portrait painters like Edouard Manet or Rembrandt van Rijn, I sometimes wonder:
What kinds of beautiful fine art portrait photographs might they have taken if the camera had been invented during their lifetime?
After all, a camera is not just a helpful tool to capture someone’s likeness or take snapshots – it can also be used to create painterly portraits that look like artworks in their own right.
In this post, I will explain exactly how you can do that.
In the article, I share how to create fine art portrait photography, including essential tips for conceptualisation, location, lighting, posing, and postprocessing.
Let’s get into it!
(Just so you know: This post contains affiliate links. As an Amazon Associate I earn from qualifying purchases).
1) What Exactly Is Fine Art Portrait Photography?
First of all, let’s define what fine art portraiture actually is.
Generally, you could say that fine art portraits go beyond capturing the model’s likeness.
Unlike commercial or casual portrait photography, which often focuses on straightforward representation, fine art portraits convey deeper narratives and emotions.
When taking a fine art portrait, you’re trying to evoke feelings or provoke thought.
Hence, composition, lighting, and subject play an important role because they help you evoke feelings or tell a particular story.
This means that, as the fine art portrait photographer, you will most likely have a vision for your shoot beforehand and use elements like composition, lighting or styling to realise it.
In the next section, I will give you tips for finding ideas and conceptualising your portrait.
2) Conceptualising Your Fine Art Portrait
The first step in the fine art portrait photography process is developing a concept, since this sets the foundation for a meaningful, evocative image.
How to Find Inspiration for a Concept?
In order to develop a concept, you could draw inspiration from all types of sources.
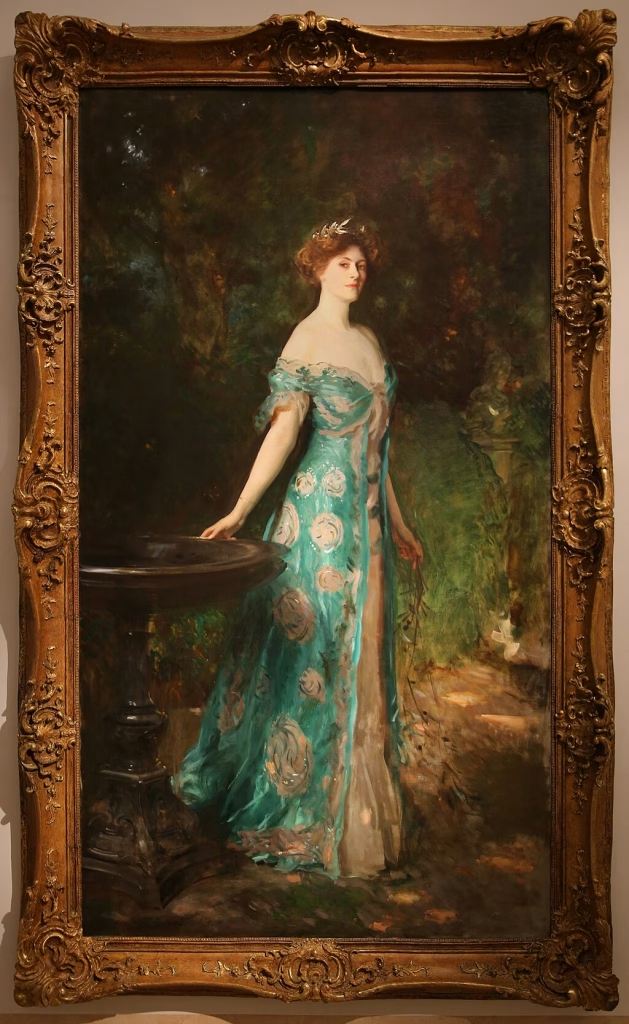
I tend to get very inspired by classical art as I love how masters like Leonardo da Vinci or John Singer Sargent used light and shadow to create dramatic images.
Hence, I highly recommend you look at some classical portraits to get inspired, especially in terms of lighting, composition, and posing.
You could collect references by taking photos in a museum or creating a mood board/Pinterest board online.
Other great inspiration sources are literature, personal experience, emotions, artworks in other disciplines (like sculpture), song lyrics, or particular art styles like surrealism.
What Do You Want to Communicate?
Next, it always helps to ask yourself the question of what you want your portrait to communicate.
Are you trying to reflect on beauty, identity, femininity,…?
What mood or emotion do you want to convey?
Do you want the portrait to evoke joy, sadness, melancholy,…?
Once you have identified these elements, you can define your vision and make sure that stylistic elements like pose or lighting align with it.
Collaborate With Your Subject
You can also collaborate with your subject to bring your concept to life.
After all, portrait photography is all about making the subject feel at ease so they act natural in front of the lens.
Hence, it’s always a good idea to take some time and talk with your subject before the shoot. Introduce the concept and ask their thoughts and feelings about it.
This will create trust between you, which in turn leads to more authentic expressions and a genuine connection.
When the subject feels involved in the process, they will be more likely to contribute to the narrative, resulting in a better portrait in line with your artistic vision.
Before I move onto the next section…did you know you can download my free portrait photography ebook? More info below:
Free Ebook: 50 Portrait Photography Ideas
If you need fresh inspiration for your portrait photography, download my e-book which contains 50 creative ideas and projects for portrait photography.

…but now, back to the blog post!
3) Planning the Shoot: Location and Styling
Next, let’s talk about some important fine art portrait photography elements: location, styling, and wardrobe.
3.1) Location
I would advise you to think very strategically about the right location for your fine art portrait shoot.
This could be either a studio environment or an outdoor setting.
If you don’t have access to a professional photo studio, you can easily create one at home – have a look at this blog post for more information.
When selecting a location, always keep your concept and artistic vision in mind.
For indoor shoots, you may want to use a fine art backdrop made from canvas, vinyl, seamless paper, or other materials.
I love backdrops because they transform any space into a fine art studio in minutes, plus they are not very expensive.
If you would like to invest in a fine art backdrop, check out the brand Kate – they offer backdrops in all kinds of colours and with different motives like flowers, curtains, etc.
By the way, you could also make your own backdrop by painting a piece of foam board or canvas, or simply hang up some curtains or a large sheet of draped fabric.
For outdoor shoots, always think about the time of day you’re shooting:
For a warm, romantic aesthetic, you could shoot during the golden hour (just before sunset).
Or if you’re going for a nostalgic, lonely, or sentimental mood, shoot on an overcast, grey day.
The colour palette of your location should also align with your theme – muted tones can evoke nostalgia, while vibrant colours create a sense of joy and energy.
Lastly, the atmosphere of your chosen location should resonate with the emotions you want to convey, for example, calm and tranquility in a serene garden or hectic in an urban environment.
I promise to keep this blog completely ad-free so you can read without distractions. If you want to support my work, buy me a coffee: It’s a small gesture that makes a big difference!
3.2) Styling and Wardrobe
Styling and wardrobe are two of the most important elements when it comes to fine art portrait photography.
The right clothing, makeup, and props can add texture and depth to your image and help convey your message.
Again, always consider how clothing, make-up, and other styling choices contribute to your theme or concept.
For example, flowing fabrics can evoke movement or grace, while minimalist, structured pieces convey strength or rigidity.
Next, use props that fit your concept, for example, flowers, a piece of jewellery, a book, feathers, etc:
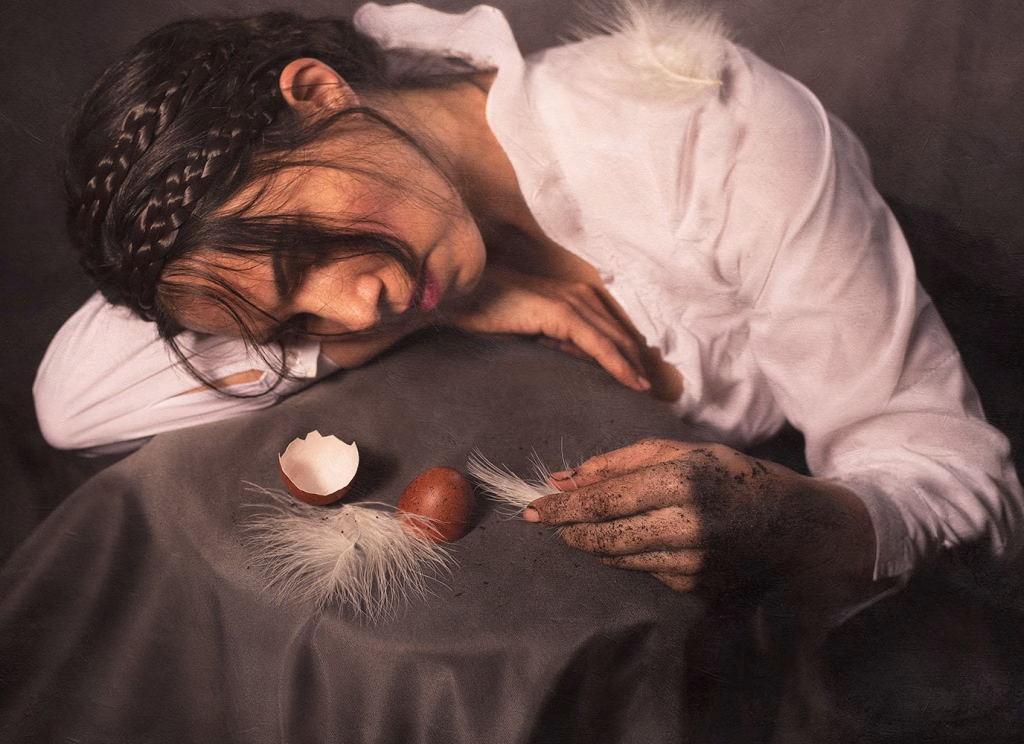
I love using props because they act as simple symbols for complex themes and emotions like freedom, fear, death, happiness, etc.
If you want to learn more about this, make sure to check out this post on symbolism in photography.
4) Using Lighting for Artistic Effects
Lighting is perhaps the most important element when it comes to fine art portrait photography since it not only illuminates the subject, but also creates mood, depth, and emotion.
Even though you can do a lot with natural light (i.e. window light), I prefer using artificial light such as a strobe with a softbox attached because it gives you more creative options.
If you’re unfamiliar with artificial lighting, check out this post where I explain how to use studio lights in detail.
I also recommend this brilliant book which is perfect for beginners:
STUDIO: Lighting Setups for Portrait Photography
In the next sections, I will share a few common lighting techniques used in fine art portraiture.
I will also include some key recommendations to achieve each effect.
4.1) Dramatic Lighting
One of the most impactful techniques (and my personal favourite) is dramatic lighting as you would commonly see in paintings.
What’s great about this kind of light is that it emphasises contrast and gives your images an intense, moody look.
An artist famous for his dramatic lighting is Rembrandt.
The subjects in his paintings are usually lit from one side of the face, which creates a small triangle of light under the eye on the opposite side.
In fact, he is so well known for this lighting technique that it is called “Rembrandt lighting” to this day.
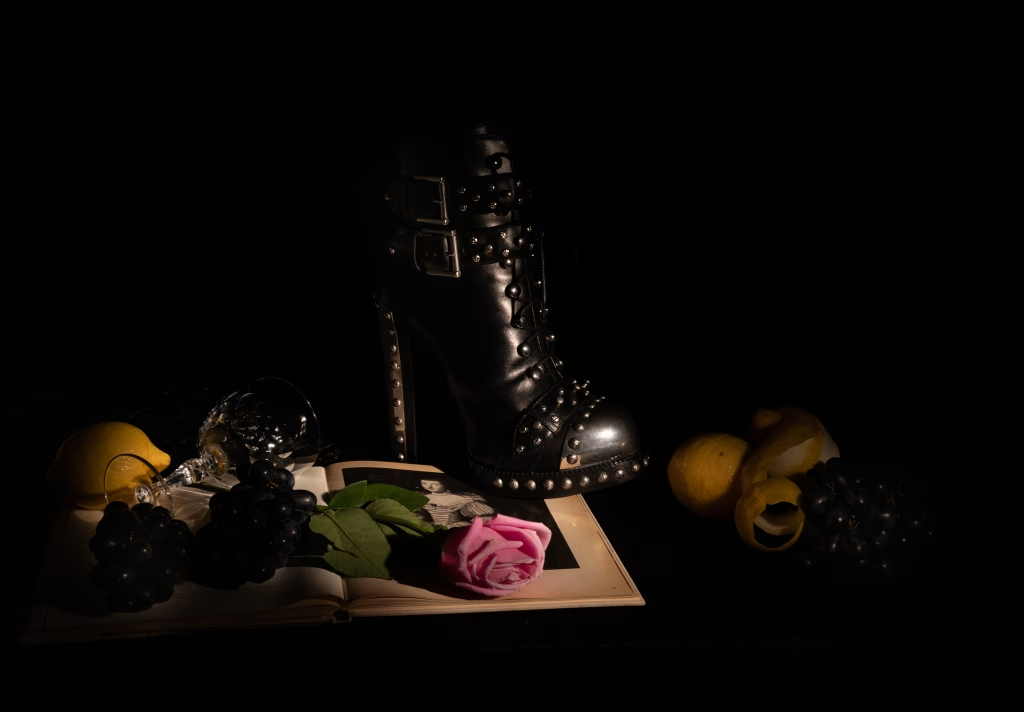
You can achieve dramatic lighting by placing a hard light source or a light with a honeycomb grid (see gear recommendation below) at an angle to the subject.
Here’s an example of one of my still life photographs:
I used a strobe light with a honeycomb grid attached – you can immediately see how painterly the light looks.
Recommended gear:
Godox SK400II Studio Strobe 400W, 2.4G Wireless
NEEWER 22″/55cm Octagonal Softbox with Honeycomb Grid
4.2) Soft Natural Light
In contrast, soft natural light will give you a more even, flattering look without obvious or harsh shadows.
Here’s an example:
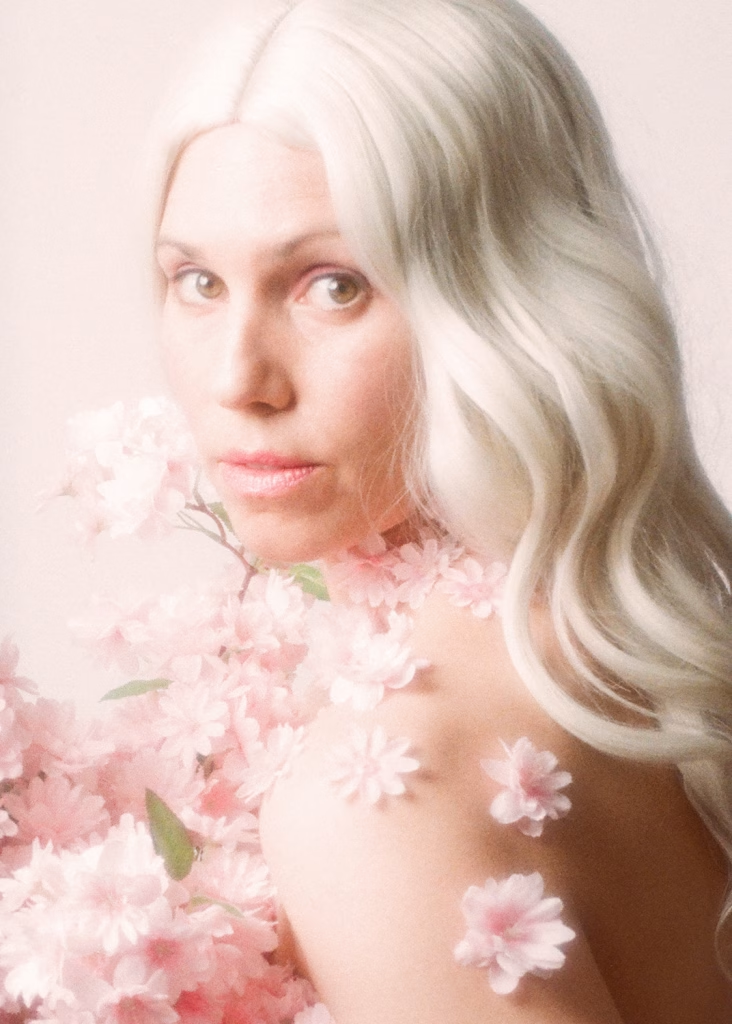
Soft light is achieved by diffusing the light source, either by shooting outside during the golden hour (after sunrise or before sunset), or by using a diffuser like a softbox or beauty dish.
If you have large windows in your space, you can also position a model right next to the window.
Ideally, use a window without direct sunlight, as this will make the light quite hard and produce strong shadows.
When shooting next to a window, you can use a reflector or a piece of white foamboard to brighten up dark areas on the opposite side of the face.
Recommended gear:
Neewer 24 inches/60 centimeters Octagon Softbox with Bowens Mount
Neewer 5-in-1 Portable Round 32 in/80cm Light Reflector
5) Posing for Fine Art Portraits
Another important aspect of fine art portrait photography is posing.
In commercial photography, poses are usually quite traditional and symmetrical.
In fine art portrait photography, it’s worth going for more dynamic, expressive poses:
Encourage your subject to move around, stretch, or lean in unexpected ways and to express their personality through their movements.
Also don’t forget the hands, as they can express many different emotions:
For example, clenched fists can communicate anxiety or tension; extended fingers or hands in graceful positions can communicate poise; hands softly placed on the body can express vulnerability, and so on.
The same goes for body language in general – always think strategically about what emotion you want to convey and how your subject could express this through their body language, for example using an upright, open stance to suggest confidence and strength.
If you want to learn more about posing, I would recommend this book:
Photographing Women: Posing, Lighting, and Shooting Techniques for Portrait and Fashion Photography
6) Post-Processing and Editing Fine Art Portraits
Finally, let’s talk about how to post process and edit your fine art portraits.
This is of course an optional step, however, I do recommend it because it will give your images that professional look.
Here are some steps you may want to include in your editing process:
6.1 Retouching
Retouching is a tricky topic because normally, you wouldn’t want to make people look unnatural or flawless in a way that looks artificial.
However, I do like to heavily retouch my fine art portraits because I find that skin blemishes or other imperfections can really distract from the overall aesthetic of the photograph.
Personally, I like to go for an almost painterly effect where the skin looks clear and even-toned, stray hairs are removed, etc, like in this image:
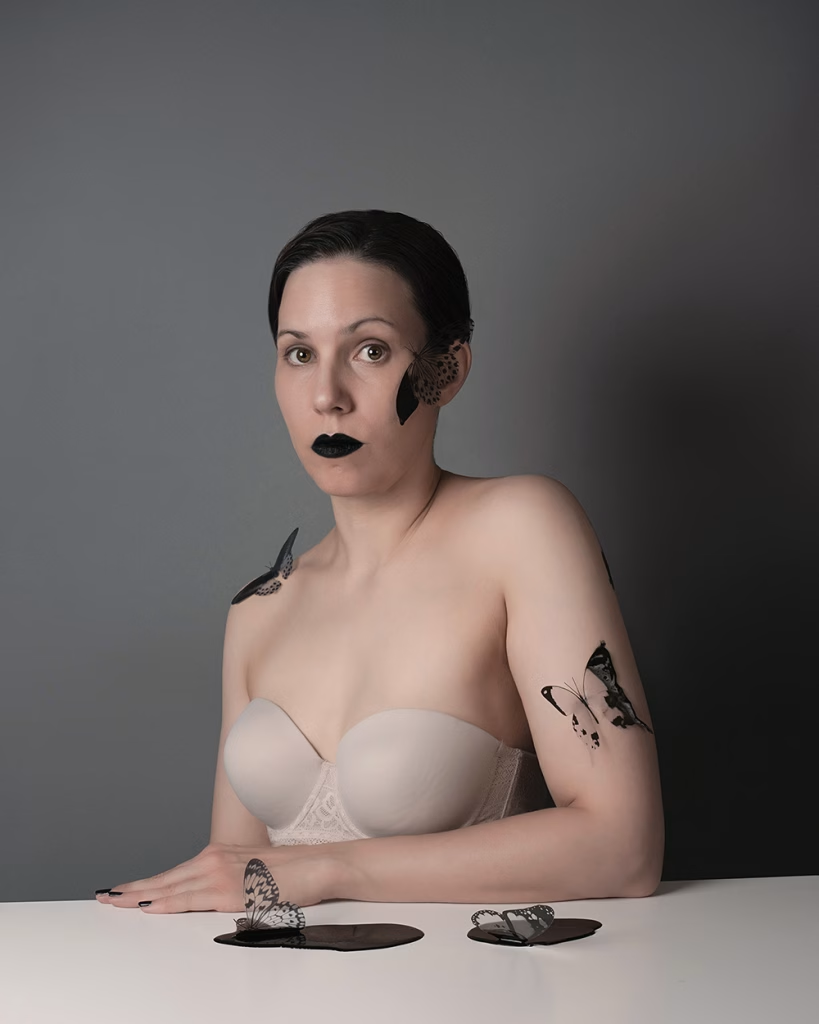
I wrote a post on fine art skin retouching which you can find here.
If you want to dive deeper into the topic, check out this online course by professional photographer Rebeca Saray which I highly recommend – it’s about nude photography, but includes highly detailed skin retouching tutorials.
6.2 Adding Shadows and Highlights
Next, you may want to consider adding additional shadows and highlights in your photograph by using tools such as Dodge and Burn or Curves in Photoshop.
This works best when using a tablet and stylus, as this will give you a lot of control over which areas to enhance.
For example, I always add more shadows to define cheekbones, jawline, or other facial contours and add some extra highlights on key areas such as eyes or forehead.
This gives my images a more three-dimensional look reminiscent of classical paintings.
6.3 Colour Grading
Another important step in my fine art editing process is adjusting individual colours or doing an overall colour grade.
For example, I may add some blue tones to the shadows and yellow tones to the highlights to give the image a more painterly look.
I might also adjust the overall reds, blues, yellows, and other hues in my image to make them look brighter, more saturated, less saturated, and so on.
You can read everything about colour grading in this post here.
6.4 Adding Textures
Finally, you can add some textures to the image to give them a fine art look.
One option is to create those textures yourself by photographing painted canvases, different types of paper, a muslin cloth, marble and other stone surfaces, etc.
Alternatively, you can use stock textures – check for free ones on sites like Unsplash.com or buy them in photo libraries such as Adobe Stock.
You can add one or several textures in Photoshop and then play with the blend modes and masks to apply them only where you want them.
Hopefully, you found this post helpful and you can use some of these tips for your next fine art portrait photography shoot.
If you have any feedback or suggestions, feel free to leave me a comment below!
P.S.: If you enjoy taking self-portraits, check out my free ebook below:
Free Ebook-50 Self Portrait Photography Ideas
Do you love self-portrait photography, but lack inspiration for your shoots? Then download my e-book with 50 ideas for self-portrait photography!

I found your post very interesting. I retired about eight years ago but still like fooling around with portraits every now and then.
oh thank you so much for commenting!! That’s great you’re still sometimes taking portraits despite being retired! Nice to keep the passion alive even when you don’t “have to” anymore 🙂