
Would you like to take boudoir self portraits, but don’t know where to start?
Then keep reading because in this blog post, I give you the complete rundown on taking your own boudoir photos, from getting into the right mindset and setting the scene to lighting options, camera settings and editing your shot.
In each section, I’ve also included useful resources like beginner friendly photography/home studio gear or helpful books.
So keep reading and get ready to take beautiful, sensual and powerful self portraits in no time!
(Just so you know: This post contains affiliate links. As an Amazon Associate I earn from qualifying purchases).
Introduction: Why Take Boudoir Self-Portraits?
At first glance, taking your boudoir portrait may seem a little weird or intimidating.
However, I couldn’t be a bigger fan of boudoir self-portraits for several reasons:
First of all, the process will make you feel incredibly empowered.
By photographing yourself in your own space, you can explore your own beauty and sensuality on your own terms and portray yourself exactly how you would like to be seen.
Another big advantage of taking boudoir self-portraits is the fact that you will have full control over the creative process.
You decide everything, from the mood and poses to the lighting and outfit, so that you can achieve your creative vision without external pressures.
Boudoir self-portraits also provide a perfect way to express yourself in the comfort of your own home.
This is great if (like me!) you’re someone who feels shy or uncomfortable in a professional studio.
You can take your time, experiment with different styles and allow yourself to be completely at ease.
In the next section, let’s talk about how to best prepare for your boudoir self-portraits.
1) Preparing for Your Boudoir Self Portraits
This section is all about how to prepare for your boudoir self portrait, from defining your creative vision to preparing your space and outfit.
1.1) Setting the Right Mindset
I think what’s really important to remember is that boudoir photography is about embracing authenticity, not achieving perfection.
If you’re feeling self-conscious, remember that:
- almost all professionally taken portraits you see in the media are heavily edited
- posing is a true art – professional photographers and models know which angles and poses work better than others and will avoid unflattering poses
- everyone can look beautiful in a photograph when using the right lighting, pose and camera angle
When taking your boudoir self-portrait, it’s always helpful to focus on how you feel rather than how you look as this will deliver way better results.
Sometimes, when I take self portraits, I can’t get the expression right in the beginning because I’m too self-conscious or too focused on a particular outcome, which always results in tension in my face or an insecure look in my eyes.
However, as soon as I think confident thoughts and really embody the emotion I want to portray, I usually manage to get a good shot.
1.2) Defining Your Vision
When planning your boudoir self-portraits, one of the first steps is to define your vision for the shoot as this will influence every decision you make.
Start by establishing the mood you want to convey.
Are you going for something sensual, playful, empowering, or artistic?
The mood will affect how you pose, what kind of lighting you use, and even the choice of colours.
A sensual mood, for example, might involve softer, lower lighting, while a playful or bold aesthetic could include bright colours and more dynamic poses.
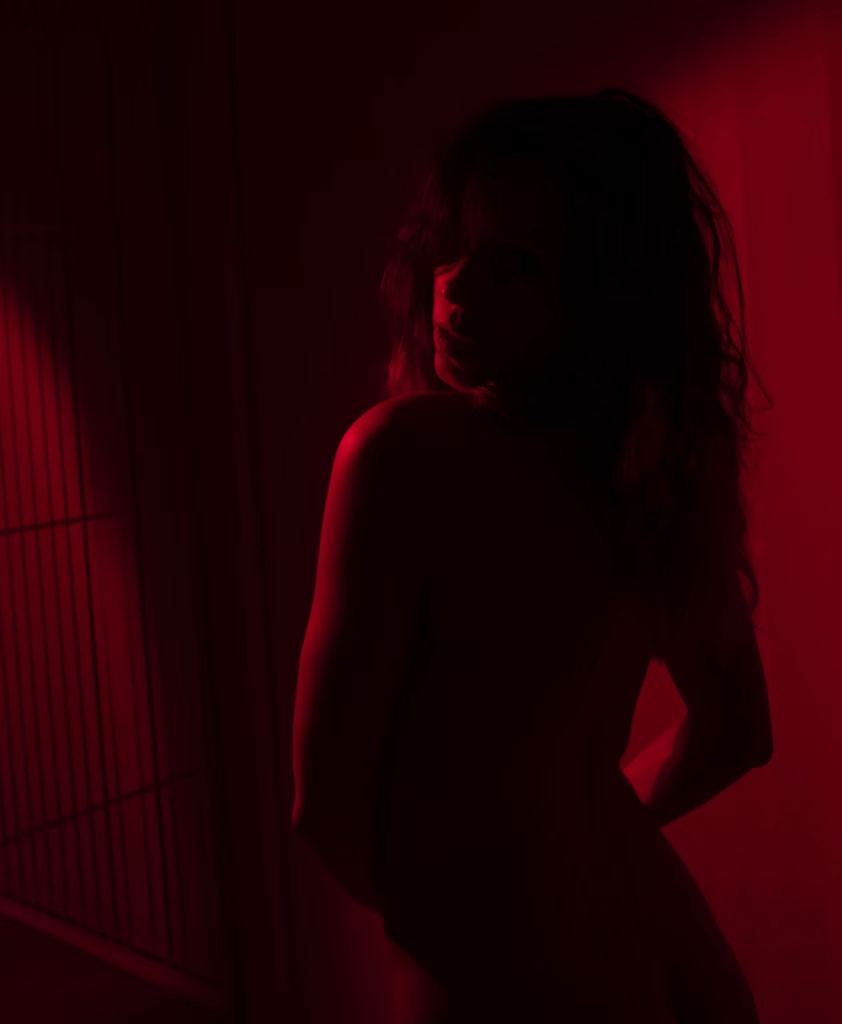
Here’s an example where I used a red coloured gel in front of my main light in order to create an intimate, sultry atmosphere:
If you’re feeling stuck or need some further inspiration, I recommend looking at some boudoir photography on Instagram or even creating a Pinterest moodboard with poses, outfits and aesthetics you like.
You can also explore photography books, magazines or even fine art for inspiration (especially classical painting, which can be super useful for finding beautiful poses).
Finally, it can help to define a particular theme or narrative.
For example, do you want a romantic vibe, something classic and timeless, or something daring and bold?
Perhaps you want your shoot to tell a story, be it of self-discovery, empowerment, or sensuality.
Having a narrative or theme helps you remain focused, plus it’s easier to make decisions on outfit, props and backdrop.
1.3) Preparing Your Space
Choosing the right location is essential when it comes to taking beautiful self portraits.
Above all, you should feel comfortable and safe since you’ll most likely be wearing very little!
You could either shoot in a private location like your home, or in a rented location like an Airbnb or hotel room.
The space should make you feel relaxed and free to explore different poses without feeling self-conscious.
Once you’ve chosen your location, it’s important to declutter and prepare the area to match the mood you’ve established.
You definitely don’t want any distracting elements in the background as these are very annoying to remove in post-production!
Depending on your theme, you can add a few personal touches to enhance the look and feel of the image.
For a romantic aesthetic, you could include candles, fresh flowers or soft fabrics draped over a bed or armchair.
If you’re going for a more artistic or edgy vibe, mirrors, bold fabrics or abstract props can help create more atmosphere.
You could also try adding small details like fairy lights or decorative pillows in order to add warmth and texture, making your space feel more intimate and inviting.
1.4) Outfit and Styling
Your outfit plays a huge role in how you feel and look during your boudoir shoot.
When selecting lingerie or other outfits, the most important factor is choosing what makes you feel sexy and confident.
Next, I would definitely recommend adding accessories to complete your outfit.
Jewellery like layered necklaces, chandelier earrings or delicate bracelets can add a sensual touch, while robes, stockings or heels can make your outfit more bold or sexy.
When it comes to hair and make-up, your choices should complement the mood of the shoot.
For example, add a strong red lip and glamorous waves for a classic 1950s Hollywood look, or try straight hair, minimal make up and glossy skin (using Vaseline or glycerine) for a 90s look à la Calvin Klein.
By the way, you don’t have to be an expert in hair and make up – whenever I do this sort of shoot, I follow YouTube tutorials or even ask friends to do my hair or make-up.
A great alternative to styling your own hair is using wigs, which I love because you can easily change up your looks without any hairstyling skills.
1.5) Incorporating Props, Fabrics and Textures
Meaningful props can add a personal touch to your boudoir shoot and help tell your story.
Personally, I love using flowers because they give my images a very soft and feminine touch.
Another great prop choice are candles in varying heights or placed around the room, as they add romance and warmth (bonus – they cast a very flattering light on your face and body).
Another classic prop for self portrait shoots are mirrors.
You can either shoot only your reflection in the mirror or include yourself AND the reflection in the frame, for example by holding up a pretty hand mirror.
Try playing around with different angles and compositions until you find one you’re happy with.
Next, I highly recommend you incorporate fabrics and textures into your boudoir shoot to create a more beautiful composition and atmosphere.
There’s a reason why many classical boudoir paintings, like for example the one below, also include lots of fabrics and textures!
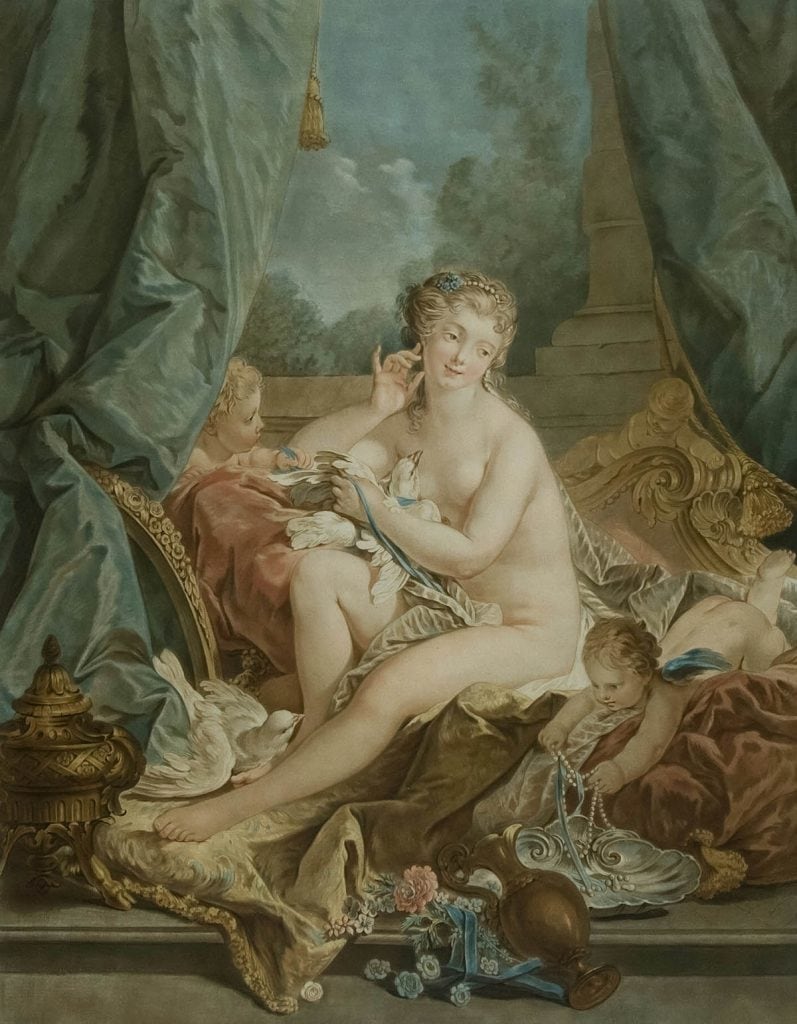
Classical Boudoir Painting. Image Credit: Art Institute of Chicago.
It’s also worth using luxurious, sensual fabrics like silk, lace and velvet that add depth and richness to the scene.
You can drape them over furniture, use them as backdrops, or even drape them over your body.
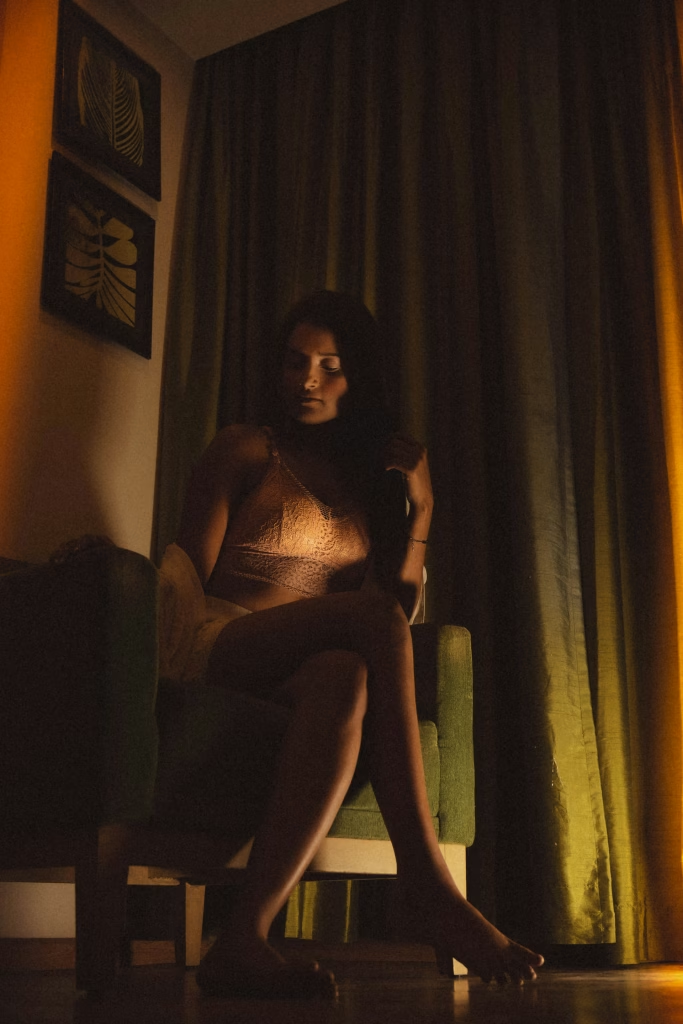
Also play with bedsheets, throws and curtains to introduce a cozy, inviting feel to your photos.
1.6) Using Studio Backdrops
As mentioned, it’s important to create a clutter free background for your boudoir self-portrait.
One easy way to do this is to use a professional photography backdrop – that’s usually what I go for because I like the painterly effect these create.
In fact, I love studio backdrops so much that I’ve written a whole blog post about them – check it out here.
One option is to just buy the backdrop cloth and attach it to a wall or some furniture using tape or spring clamps/clothes pegs.
Alternatively, you can get an inexpensive backdrop stand on which you can securely attach the backdrop.
By the way…did you know you can download my free ebook “Self Portraits Made Easy” with pro tips for self portrait photography?
Free Ebook: Self-Portraits Made Easy
If you love taking self-portraits but struggle with the technical aspects, download my free guide with essential self-portrait photography tips and common mistakes to avoid.
…but now, back to the blog post!
2) Essential Gear and Setup
In the next section, let’s talk about essential gear, lighting and setup!
2.1) Camera and Equipment Options
Using a DSLR or Mirrorless Camera for Advanced Control
It’s absolutely not essential, but if you DO have access to a DSLR or mirrorless camera, I would recommend using it because you can take full control of your shoot.
These cameras offer advanced settings for aperture, shutter speed and ISO, which allow you to adjust for lighting conditions and create the desired depth of field.
Another benefit of using this sort of camera is that you will get a high resolution image, giving you more freedom to crop or edit your photos without losing quality.
If you want to learn the basics of photography using a DSLR or mirrorless camera, check out my articles on aperture and shutter speed/ISO.
Maximizing Quality with Phone Cameras
If you don’t own a DSLR or mirrorless camera, don’t worry!
You will absolutely be able to produce a beautiful boudoir photo using a smartphone, as well.
Most modern smartphones have powerful cameras with built-in portrait modes that blur the background for a professional look.
To get the best results, make sure you clean your phone lens, shoot in natural light whenever possible, and adjust your camera settings for optimal resolution.
There are also lots of apps that provide manual controls over exposure and focus, which can help you elevate the quality of your images.
Camera Accessories: Tripods and Remote Triggers
No matter what camera you use, a sturdy tripod is essential for taking sharp self-portraits.
For smartphones, a phone mount that attaches to a tripod will keep your shots steady.
The next tool I would invest in is a remote shutter or timer to allow for hands-free shooting, giving you the freedom to move, pose, and adjust without rushing back to the camera.
Remote triggers are connected via Bluetooth or cable and are actually very cheap to buy – just make sure you get the right one for your camera model!
If you’re using a DSLR or mirrorless camera that has Wi-Fi/Bluetooth compatibility, I highly recommend triggering the shot remotely via a phone app connected to your camera (for example, for my Sony camera, the app is called Imaging Edge Mobile).
These apps are very helpful because they help you get the focus right in your self portrait – you simply tap on the screen where you want the focus to be.
2.2) Lighting Options
Lighting is one of the most important aspects of photography and can really make or break your image.
Using Natural Light
When shooting boudoir self portraits, I recommend you use natural light if available because it will provide a very soft, flattering effect (especially during the golden hour which occurs just after sunrise or before sunset).
In order to take advantage of natural light, shoot next to a large window (but try to avoid direct sunlight falling through the window as this will create very harsh shadows).
Instead, either shoot on a cloudy day or use a window that doesn’t have direct or strong sunlight, like a north facing window.
An easy and cheap trick to brighten up shadows on the side of your face/your body that isn’t facing the window:
Place a large white piece of cardboard or foamboard on the side you want to brighten up, reflecting the window light back onto your skin.
Using Artificial Light
If you don’t have a big enough window in your space or want more control over the light position, you can also use artificial lighting such as ring lights or softboxes.
These kinds of lights produce a soft, diffused light that reduces harsh shadows.
If you need some help on how to use these, check out my previous post on artificial lighting here.
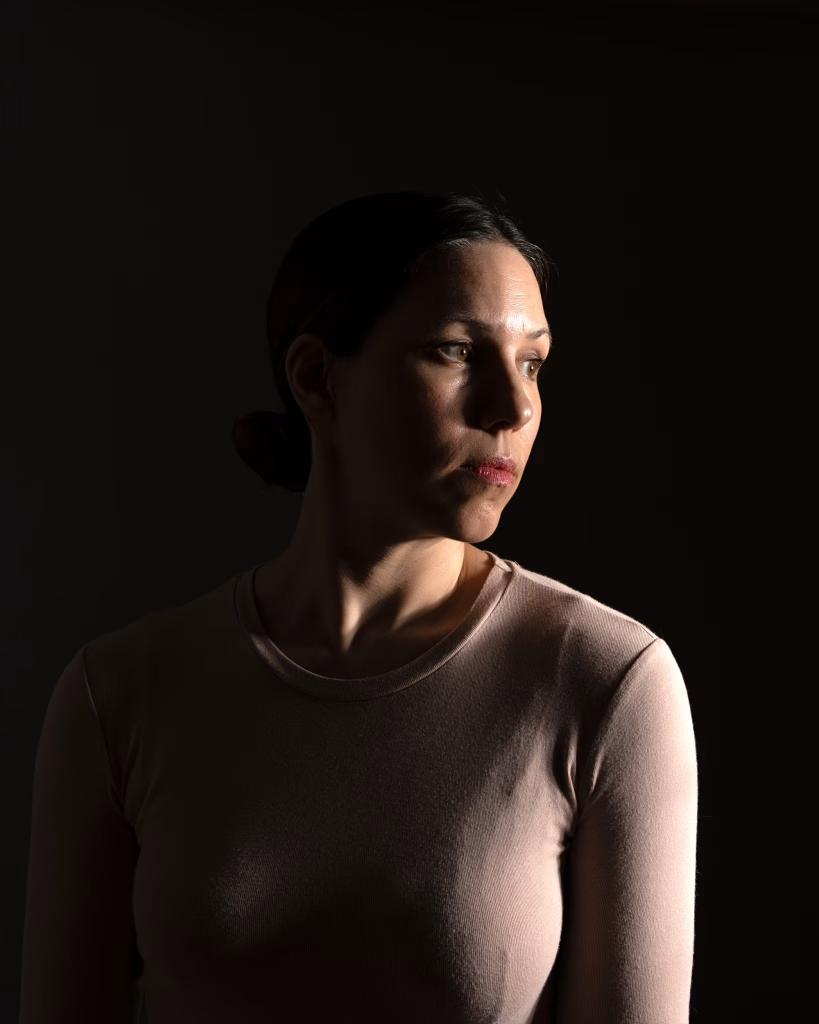
By the way, you don’t always have to go for even, diffused lighting – you could also intentionally create more dramatic lighting by placing one light source to the side for an effect like this:
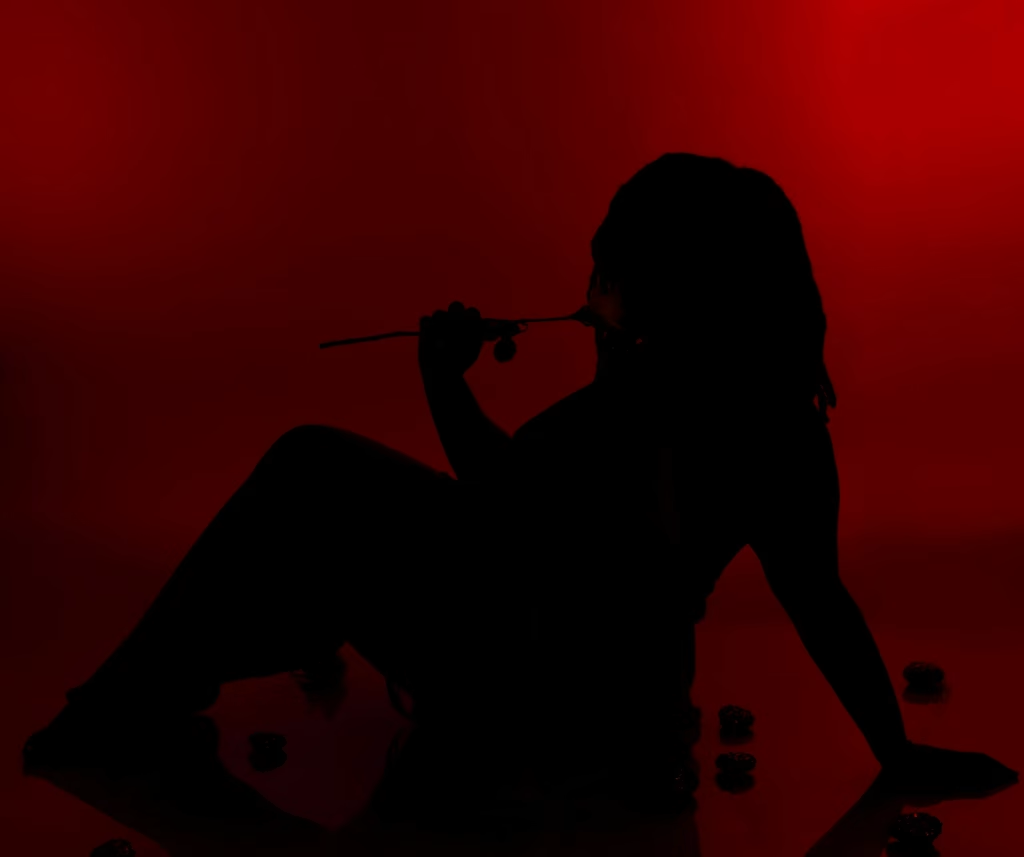
Or place the light source behind you in order to achieve a silhouette effect like in this photograph:
2.3) Camera Settings & Focusing
If at all possible, try to avoid auto mode when taking your boudoir self portrait because adjusting the settings manually will give you more creative control.
This even applies to smartphone photography – as mentioned above, you can download an app onto your phone that will allow you to control the basic settings like ISO or aperture.
Adjusting the Settings:
First, adjust the camera for the available lighting: in low light, increase your ISO to brighten the image (but don’t go too high as this will introduce noise).
Next, adjust the aperture (f-stop) depending on whether you want a blurred background or everything in focus.
A lower aperture, like f/1.4, f/2.0, or f/2.8, will create a very shallow depth of field, meaning that only the foreground/subject is sharp and the background is blurry (similar to the “Portrait” mode on the iPhone).
Also, make sure the shutter speed isn’t too slow as this will create motion blur (keep it above 1/40th of a second when using a tripod).
Getting the Focus Right:
Lastly, make sure that your face is in focus.
You can achieve this by first setting your camera’s autofocus mode to face/eye detection (smartphone cameras usually automatically focus on your face).
Then, use a remote shutter release – you can get them in any camera shop or very cheaply on Amazon.
When using the remote shutter release, first half-press the button to make the camera lens focus, then fully press the button to take the shot.
Most remote shutter releases have a timer, so you will have enough time to remove the remote from the frame.
An even better option, as discussed above, is using a phone app that syncs with your camera.
This will allow you to set the focus on the phone screen by simply tapping on your face, as well as taking the shot remotely.
Set the app to a few seconds delay so you can remove the phone from the frame.
Bonus tip: If you’re using an old camera that doesn’t have autofocus, you can simply place an object in the frame where you’ll be posing, manually focus on that, and then sit or stand in exactly the same place. It’s not perfect, but it does work.
3) Posing Techniques for Boudoir Self Portraits
When it comes to boudoir self-portraits, it really helps to know the basics of posing in order to create flattering, beautiful images.
Certain poses will accentuate different features depending on your body shape.
For example, try a standing pose with one leg slightly bent and hips angled in order to emphasise your curves, creating an hourglass effect.
Another nice option is a lying down position, such as reclining on your side with a leg extended – this will elongate your body while accentuating your curves.
Sitting poses, especially if you cross one leg or raise it slightly, will highlight your legs and create interesting angles.
In any pose, always be mindful of your posture. Elongate your body by keeping your back straight, lifting your chest and slightly stretching your neck in order to appear taller.
You always want to create length, particularly in your limbs, so you don’t look cramped or tense.
Another thing you can try is creating an S curve with your body by sticking your chest and bum out. This one feels pretty uncomfortable, but it looks really beautiful – think classic 1950s pinup.
If you want to learn more about posing and see some examples, check out this post here.
4) Editing and Post-Processing Tips
Editing your image is optional, but if you have access to either Photoshop, Lightroom or another software, I do recommend it as you can fix small issues and improve the overall aesthetic.
For editing smartphone shots on your phone, try VSCO, Snapseed or Lightroom Mobile.
4.1) Basic Editing Techniques
Begin by adjusting brightness and contrast to make sure that your images are well-lit without losing detail.
You can increase the brightness to show more details in the shadows, but avoid overexposure (making the areas so bright that they appear burnt out).
Also, try increasing the contrast to give your images more depth and dimension.
Next, play with the colour tones; for example, enhance warmth for a cozy feel or increase the cool tones for a more modern, edgy look.
Also, consider cropping in order to tighten the composition and improve the overall balance.
Cropping can also eliminate distracting elements in the background or make the image more symmetrical.
4.2) Adding Filters and Effects
If you want to maintain consistency across several photos, you could try using presets – for example, Lightroom and VSCO have pre-designed filters that will create a specific mood, such as warm vintage tones or cool, muted colours.
For a timeless feel, experiment with black and white or sepia tones.
These classic effects are perfect for boudoir photography because they can add more elegance/drama or make your photo look timeless.
If you want, you can also retouch your skin, for example using Lightroom’s clarity tool or Photoshop’s healing brush.
Be careful with this though, and don’t overdo it because it can very quickly look artificial.
If you want to learn the basics of retouching in Photoshop, check out this post.
And that’s it! I hope you found this post helpful.
Thank you for reading this post! If you want to support my blog, buy me a coffee: It’s a small gesture that makes a big difference!