
How to take a self portrait – 7 things I`ve learned
To be honest, I never meant to become a self-portrait artist – it just happened!
It all started when I was frustrated by my inability to take pictures for my (now retired) fashion blog many years ago and decided to take a one year photography course.
The final course project was a series of images around the topic of “Identity”, and I shot five black-and-white photos with myself as the model because I wanted to express my idea through body language, but didn’t have a professional model at hand.

One of my earliest self-portraits.
Even though the actual technical process of taking photos of myself was cumbersome to say the least, it somehow ignited a fire in me and marked the start of a self-exploration process through many, many self portraits.
By now, I’ve learned a thing or two about how to take a self portrait, and I thought I’d share my seven favourite tips with you so you don’t have to make the same mistakes I made.
Here are my top tips for anyone who wants to know how to take good self-portrait photos.
1) Focusing on Yourself is Hard – But There Are Some Tricks
In my eyes, the biggest challenge when shooting self portraits is getting the focus right.
At the beginning of my self portrait journey, I experienced a lot of disappointment when, after the photo shoot, I looked through my images in Lightroom and realised that, even with my best efforts, all of them were slightly out of focus.
After reading all the self-portrait photography tips I could find and taking several courses over the years, I have finally found some methods that work.
Here are my top tips for getting the focus right in your self portraits:
Use Face Recognition
If you want your face to be in focus, an easy method is setting your autofocus to face recognition and using a remote trigger (half-press the button first to focus and then take your photo).
Sync Your Phone with an App
The better alternative to a remote trigger is a phone app connected to your camera, that’s the method I use these days.
For Sony users like me, the designated app is called Imaging Edge Mobile.
I love this option because the phone screen displays what the camera sees, which also helps with framing and posing.
You can tap the area on the screen that you want to be in focus (make sure to switch off face recognition autofocus if you want to focus on a different area, e.g. an object in the frame).
Use a Delay
If you want to have both hands in the frame, make sure to set the app to self timer (I use a 3-second delay), so you have time to remove the phone from the frame.
Alternative: Use an Object as a Stand-in
If you have an old camera that doesn’t connect to a phone app, or you’re shooting self portraits with an old analogue camera, there is another way:
You can simply place an object (e.g. a tripod) where your face will be later in the shot, focus on it manually, then remove it and try to stand in exactly the same place (and then press the self timer button on your camera).
It’s not foolproof (for example, it wouldn’t work for a commercial portrait where the focus has to be perfectly placed on the eyes), but it does the job if you have no other options.
Other Focusing Tips
Finally, remember that sharpness also depends on your lens quality and particularly on aperture:
If you use a wide aperture, only a very narrow region around the optimum focus will be sharp.
In contrast, if you use a narrow aperture, you will have deeper depth of field, where the foreground and background can be sharp at the same time.
If you’re really struggling to get your focus right even with a phone app, you might have to use a narrower aperture or change your setup so that you’re closer to the camera lens.
2) Technically Correct Doesn’t Equal Visually Interesting
In my one year photography course, we learned all of the basics regarding composition, exposure, camera settings and lighting.
At the time, I remember being very intimidated by light meters which are used in studio photography to achieve the “correct exposure”.
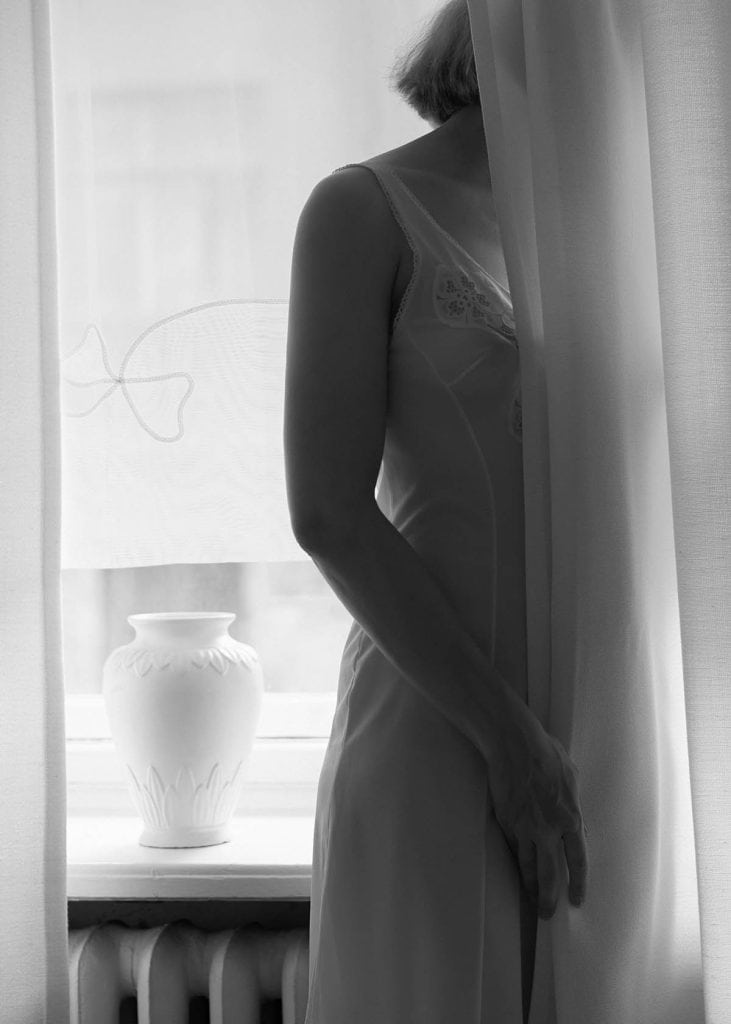
Now, this may be important for commercial photography, but if you’re asking me “how to take a self portrait”, the answer is, forget about the correct exposure, especially if your focus is on artistic self-portraits.
For example, the photo below is definitely underexposed, and the white balance is also off, but I chose these edits on purpose in Photoshop to achieve a specific mood:
When you take portraits of yourself, you are the boss.
You don’t need a light meter or any other fancy tools to get the exposure right, because there is no objective standard to achieve.
Self portrait photography is very personal, and you are the sole decision-maker in terms of colour, exposure, white balance, depth of field and shutter speed.
If you are serious about photography, there IS one tool I do recommend, however, to make sure that your fine art prints don’t look totally different than the images displayed on your monitor: a calibration tool.
This will make sure your colours in print look like what you see on the monitor.
Before I get to the next section…did you know you can download my free self-portrait ebook? More info below:
Free Ebook-50 Self Portrait Photography Ideas
Do you love self-portrait photography, but lack inspiration for your shoots? Then download my e-book with 50 ideas for self-portrait photography!

…but now, back to the blog post and more tips on how to take a self portrait!
3) Work on Your Posing
My next tip for taking a great self-portrait is focusing on your posing – the right pose can elevate your photo from average to excellent.
I know, you’re probably not a professional model and neither am I, but it’s as easy as creating a mood board with some beautiful poses and referring back to it whenever you need it.
I recommend that you look at some classical paintings for this purpose – simply take pictures of your favourite poses and collect them in an album on your phone.
Another great resource are fashion magazines and of course Pinterest, which is where I find the majority of my pose inspiration.
One extra tip: I have realised that the more awkward and uncomfortable a pose feels, the better it looks.
For example, if you’re arching your back a bit more than usual, you will create a curved shape that looks much more interesting than a straight back.
It feels weird in the moment, but you will see that it looks better in the picture.
If you’re unsure, take a few test shots first, trying out different poses and seeing which one you like best.
For a deep dive into the topic of posing for self portraits, check out my post here.
4) Be Strategic about Lighting
How to take a self portrait that looks professional? By really focusing on lighting.
Honestly, I think this is the most important factor when shooting self portraits.
I know that studio lights can seem intimidating, but if you have the budget, I recommend getting one studio flash to start with.
It really only takes a few minutes to set up, and there are so many cheap modifiers available, like soft boxes, umbrella diffusers, etc.
I started with a simple Neewer flash and an inexpensive beauty dish, and it’s made all the difference in my self portraits (check out my post on using artificial lighting here).
If you don’t want to invest in a studio flash, it’s already quite helpful to use cheap accessories like reflectors or white foam board to lighten up shadows, as well as black fabric or curtains to block out light where you don’t want it.
If you prefer natural lighting, you can still use light strategically.
For example, if you have big windows, shoot your self-portrait on a cloudy day for even, flattering light, or around lunchtime on a sunny day for harsh shadows and hard light.
I also like using small bedside lamps or floor lamps – these small, contained sources of light can create a very beautiful cinematic effect.
I promise to keep this blog completely ad-free so you can read without distractions. If you want to support my work, buy me a coffee: It’s a small gesture that makes a big difference!
5) Use Props to Make an Impact
If you want to take a great photo of yourself, it’s always worth thinking about props.
Taking self portraits can be a little repetitive because the model is always the same (you!).
Different props keep it fresh and can be a whole inspiration source in themselves. For example, look at the picture below – it was actually inspired by the softness and ethereal beauty of cherry blossoms:
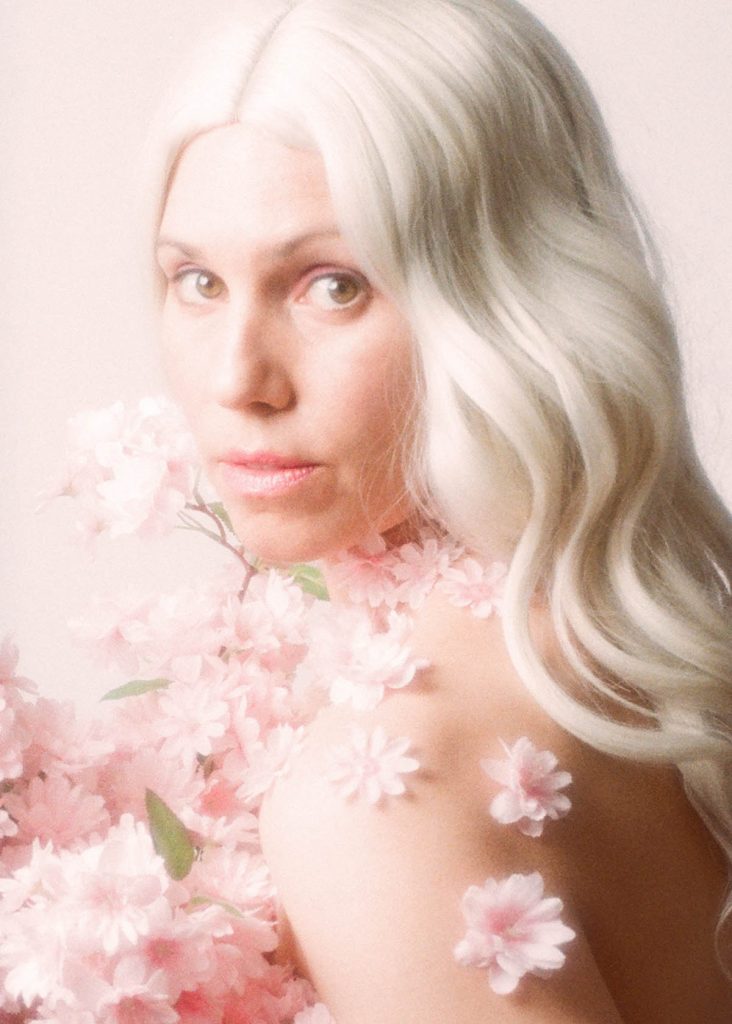
An amazing allrounder prop are wigs because they change your look completely. I have a collection of wigs that I keep rotating for different shoots.
Some other great props for self photography are: candles, vases, feathers, toys, flowers (dried and fresh) and bric-a-brac from flea markets such as retro telephones or old trinkets.
6) Keep Going – the Best Shot is Often in the Last 10 Frames
If you’ve tried to take a good self-portrait, you know that it’s anything but easy.
In fact, it’s pretty exhausting – you’re the photographer, stylist, make-up artist, lighting assistant and model all in one.
That’s why, whenever you are taking photos of yourself, you will notice that the process is quite tiring and you want to stop after a certain number of shots.
However, I have realised that oftentimes, the very best photo I took was in those 10 or so “extra shots” I took for good measure, when I actually didn’t feel like it any more.
So, when you find yourself in that moment when you’re thinking: “I’m tired of it now”, force yourself to take 10 more photos:
Those extra shots always seem to turn out better than all the rest.
7) Don’t Feel Weird – You’re Part of a Long Standing Tradition
My last self-portrait photography tip is more of a mindset shift.
When I first started taking self portraits, I felt pretty strange.
As I sat in front of my camera, with a wig on my head and a remote trigger in my hand, I often thought: “What a weirdo. What am I doing here!”.
However, I had a strong urge to keep taking portraits of myself, so I just kept going despite feeling like it was more than a little odd.
Then, about four years ago, I came across the artist Brooke Shaden, and everything fell into place.
She is not only a fine art photographer who takes self portraits, but also a respected artist represented by galleries, running an actual business based on her self-portraits!
It was a moment of complete validation for me. Finally, I knew it wasn’t only me doing this!
In fact, the more I researched the topic, the more I learned about other photographers doing the very same thing (and of course there’s a long-standing tradition of painters and artists creating self portraits, like van Gogh or Rembrandt).
So, if you take anything away from this article, let it be this:
Taking self portrait photographs is a very legitimate artistic activity.
Lots of people do it, and some make good money from it.
So, keep experimenting, improving your skills and taking beautiful self-portraits that give the world a glimpse into your artistic mind.
P.S.: For a deep dive into self portrait photography, check out my in-depth Self Portrait Photography Guide:
My Ebook: The Self-Portrait Guide!
Would you like to learn more about self-portrait photography? Then check out my ebook now! Topics include:
- how to use natural and artificial lighting
- essential gear you’ll need for self-portraits at home
- idea-finding techniques to develop concepts for photo shoots
- how to edit, export and print your images, and more!

Very informative blog and I enjoyed your content. Keep doing the good work. At Grasigner, we specialize in image editing for e-commerce companies and believe we can help enhance your operations. If you’re interested in discussing this further, please reach out!