
Rim light photography is one of those techniques that doesn’t seem to get talked about or written about much.
That’s a shame because it’s not only very easy but also incredibly impactful!
In fact, rim lighting is used in many different photography genres, such as portrait, product, or sports photography.
The best thing:
Despite its fancy name, rim lighting is very straightforward and doesn’t require much gear at all.
In this post, I will explain rim light photography, how to use it, and which common mistakes to avoid.
Let’s get into it!
1. What is Rim Light Photography?
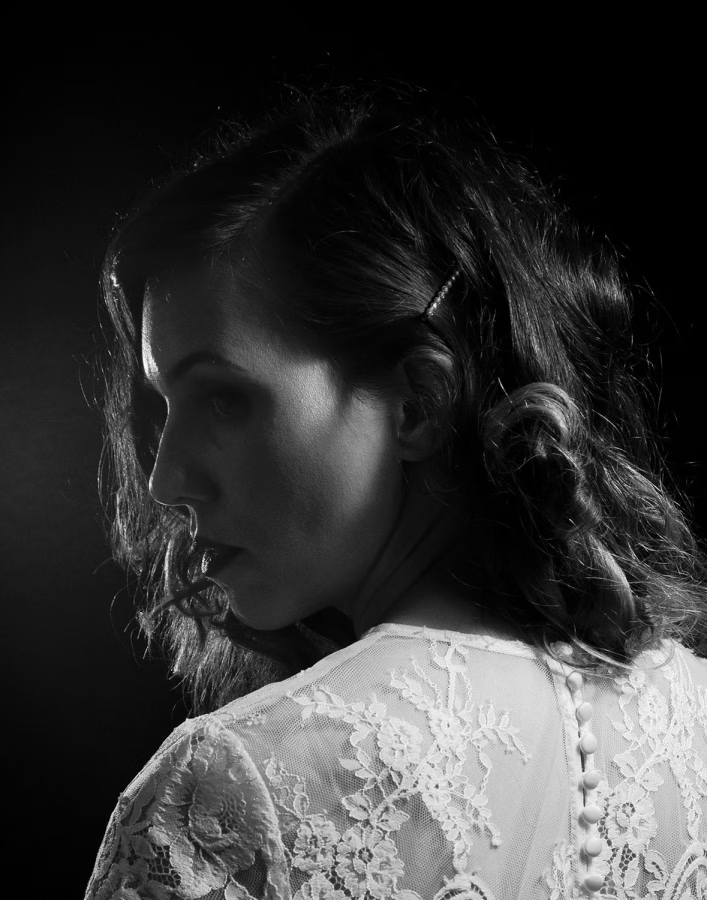
Rim light photography is a technique in which the subject is illuminated from the side or behind, resulting in a glowing outline around it.
Here’s an example; look at the bright edge around the hair, forehead, nose and lips:
Effect of Rim Lighting
The glowing highlights or contours around the subject visually separate it from the background, which gives the image more depth.
They also highlight the shape of the subject, which is why rim lighting looks especially great in portrait, boudoir or product photography.
Rim Lighting vs. Backlighting
If you were to place the light source entirely behind the subject, you would achieve a different effect; a silhouette like in this image:
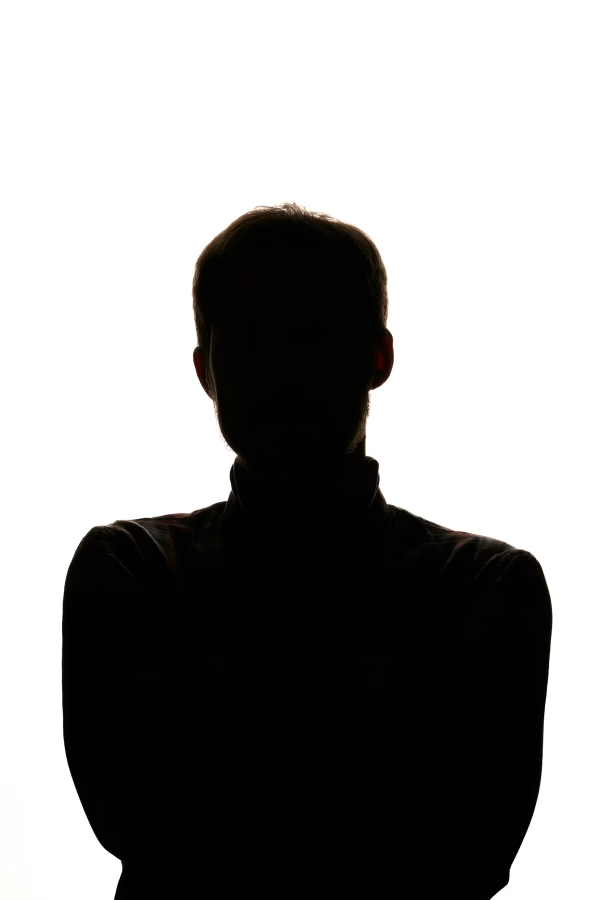
The difference here is that you don’t see any glowing outline around the subject.
Hence, when setting up your light source (following my tips later in this post), be sure to angle it to achieve rim light rather than a silhouette effect.
Uses of Rim Light Photography
Here are some ways rim lighting is used in different types of photography:
Portrait Photography: Rim light helps define the subject’s facial contours, hair, or silhouette against a darker background.
Product Photography: Rim lighting makes objects stand out against the background, making them appear more three-dimensional.
Cinematic Photography: Rim light is used in photography to create a cinematic mood and add more depth to images.
Sports & Action Photography: Rim lighting accentuates the outline of an athlete, enhancing motion.
I particularly like rim lighting in sensual or boudoir photography because it really highlights the curves and shapes of your model.
In the next section, let’s talk about how to create rim lighting.
2. How to Create Rim Lighting Step by Step
The great thing about rim light photography is that it’s not difficult to set up.
Unlike, say, Rembrandt lighting, your light source doesn’t have to be in an exact spot for the effect to work.
You may need to experiment a bit with placing the light towards the side or back, but overall, it’s pretty easy to achieve.
Here’s a step-by-step guide for creating rim lighting:
Step 1: Choosing the Right Subject and Background
Generally, rim lighting works best with a subject with defined edges that catch the light, such as a model with textured hair or objects like bottles or glasses.
To make the glowing edges more visible, use a contrasting background; dark or neutral backgrounds are usually the best choice.
Step 2: Positioning the Light Source
Now for the most important part: positioning your light source.
To create beautiful, luminous edges, place the light source behind your subject at an angle.
You know it’s in the correct position when only the subject’s edges catch the light.
If you’re unsure which angle is best, try a few different positions:
If you place the light directly behind the subject, you’ll get a full halo effect. In contrast, putting it more to the side makes the rim light effect less pronounced.
You’ll know that the light is too far back or too forward if you start to lose the glowing edge around your subject.
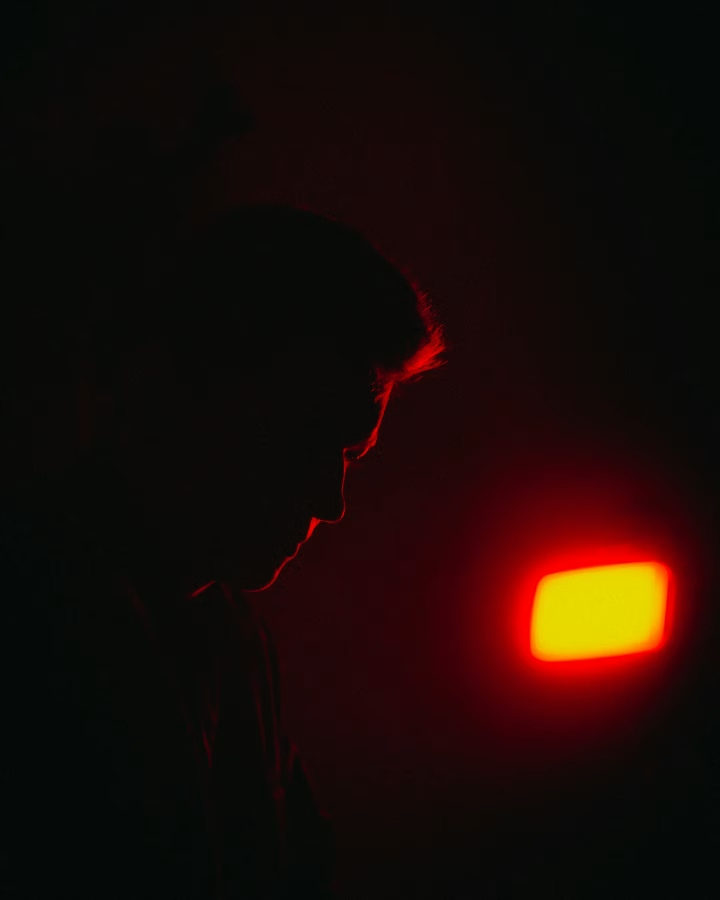
Here’s a great example of rim light where you can actually see the position of the light source in the frame:
Step 3: Fine-Tune the Light Intensity
For rim lighting to work, you have to be careful not to use too much light, which can cause overexposure/blown-out highlights.
Ideally, lower the intensity of the light to make the rim effect less intense.
If you can’t lower the intensity of your light, you can also move it further away from the subject (see the section “Common Mistakes” later in the post).
Step 4: Balancing Rim Light with Fill Light (Optional)
If your rim light is too strong, your subject may appear too dark or underexposed.
To maintain detail or avoid making your image look too dark, you can use a fill light (or a reflector) in front of the subject.
Ideally, this fill light should be diffused and not too bright; otherwise, you will lose the rim light effect.
Before I get to the next section, a quick question:
Do you like portrait photography?
Then check out my free 7-day cinematic portrait email challenge below:
Free 7-Day Cinematic Portrait E-Mail Challenge!
Do you want to master cinematic portrait photography in seven days? Then sign up for my free email challenge with a different creative prompt every day!

But now, back to the blog post!
3. Handy Gear for Rim Lighting
Next, let’s talk about some handy gear that will help you with rim light photography.
As I mentioned above, rim lighting requires no particular gear, which is why it’s such an accessible technique.
You can create beautiful rim light photography shots with window light, household lamps or other free light sources, so you don’t need to buy any extra equipment.
However, if you have access to a studio or are willing to invest in new gear, consider the different light sources and modifiers below.
They are all optional but will give you more options for lighting your images and more creative control.
Artificial Light Sources
With natural daylight, you’re dependent on the time of day, the weather and other factors.
That’s why I love using artificial light sources for my photography: I can use them at any time of day and increase the intensity depending on my creative concept.
Here are some artificial light sources you could use for your rim light photography:
- Studio strobes
- LED panels or other continuous lights
- Speedlights
I think a lot of photographers are a little bit intimidated by these kinds of light sources, but in reality, they’re very easy to use.
If you would like to learn more about artificial lighting, read my in-depth blog post here or watch my YouTube video tutorial here.
Light Modifiers
Next, you may want to modify your light using tools such as softboxes, strip lights, reflectors, or snoots.
You can modify light in several ways:
Diffused Light
You can make light softer (diffuse it) to make it more even and flattering; typical tools are softboxes, umbrellas, and other tools with light-diffusing materials.
Reflected Light
There are tools like reflectors or bounce cards that reflect light back onto the subject.
These are used to lighten up shadows and come in different colours, like gold and silver.
Dramatic Light
Next, there are tools that shape the light or block it from certain areas, for example, barn doors, snoots or honeycomb grids.
These create more contrast and shadows, leading to a more dramatic effect.
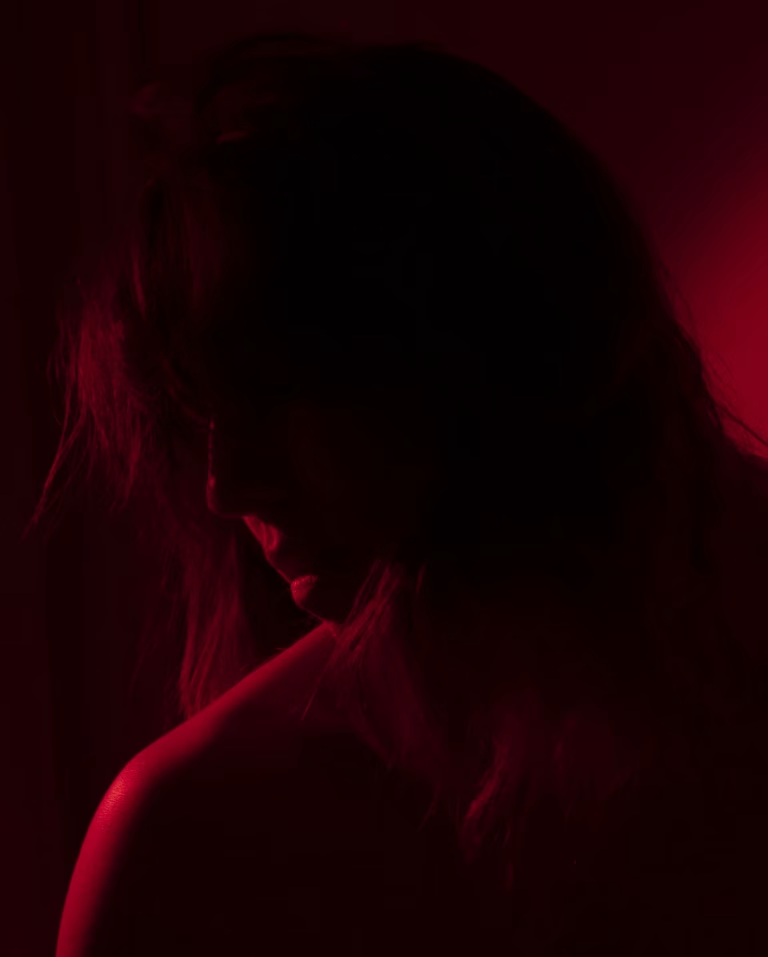
Coloured Light
Finally, you can use colour light modifiers such as coloured gels– these are great for creative effects like in this picture:
Again, you can find more info about light modifiers in this blog post.
Using Artificial Lighting for Rim Light Photography
The benefit of using artificial lighting for your rim lighting shots is that you have way more flexibility:
You can position the light source wherever you like, change the angle, increase or decrease the intensity, or modify the light precisely to your liking.
That’s why I highly recommend you try out some artificial lighting if you can.
If you don’t have the budget to buy artificial lights at the moment, you could borrow them from a friend or even hire them for a day.
In the next section, I’ll talk about some creative ways to use rim lighting…but before I get to that, did you know you can download my free ebook below?
Free Ebook: 50 Portrait Photography Ideas
If you need fresh inspiration for your portrait photography, download my e-book which contains 50 creative ideas and projects for portrait photography.

…but now, back to the post.
4. Creative Ways to Use Rim Lighting
What I love about rim lighting is that you can use it to achieve different effects, for example, a soft, sentimental mood or a mysterious look.
Here are five creative ways to use rim lighting:
Portrait Photography
In commercial photography, portraits are usually well-lit and shot with very even and flattering light.
Rim lighting, in contrast, is great if you want to go for a more atmospheric, moody look.
For example, you can use a backlight behind the subject so that the glowing outline highlights the shape but keeps the face in shadow:
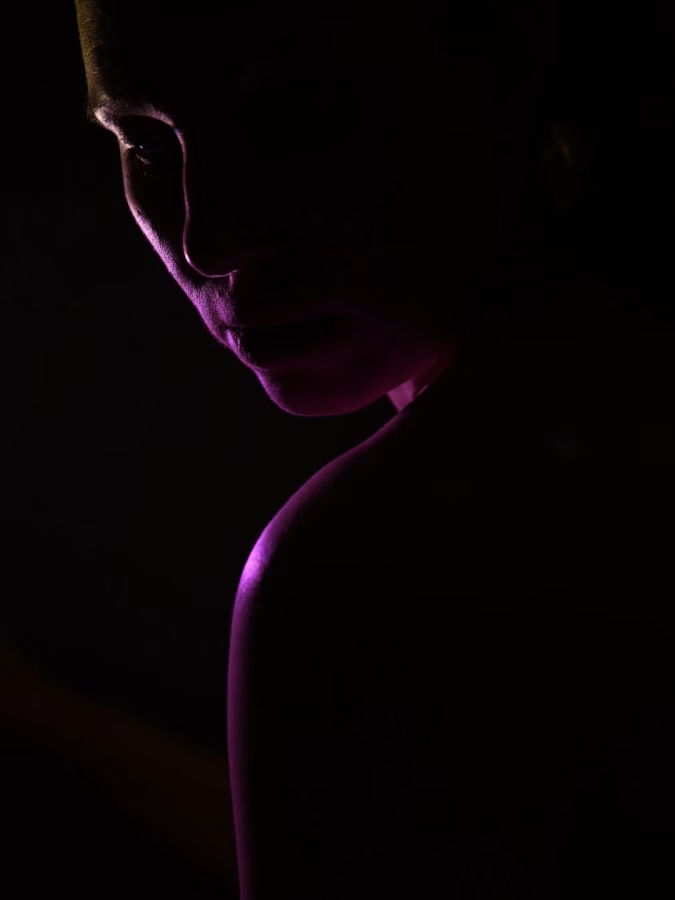
Another great effect is to use rim lighting for an extremely minimal effect like in this image:
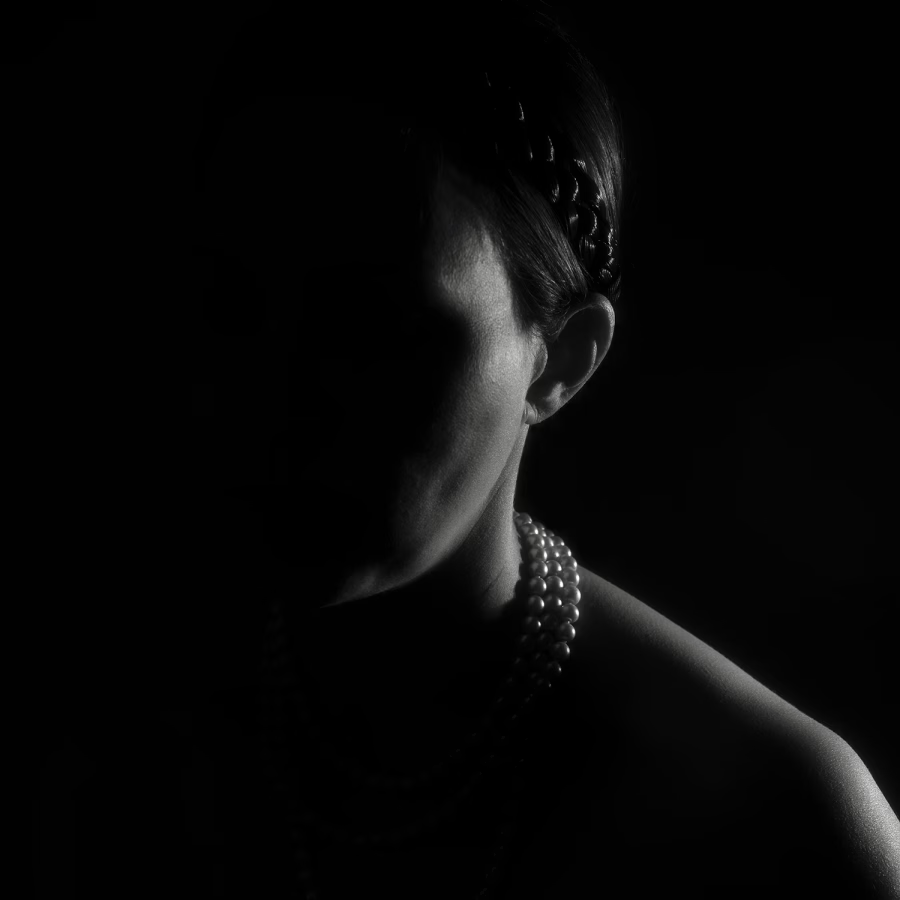
I love this kind of lighting because the large amount of shadow creates a very mysterious effect.
Try this for character portraits when you don’t want to reveal all the facial details but rather keep some areas dark.
Still Life/Product Photography
If you want to photograph objects rather than people, you can use rim lighting for a very polished, high-end look.
Just like with portrait photography, the rim light emphasises shape and texture rather than details and separates objects from the background.
Try rim lighting combined with glass, metal or other reflective materials:
The light will create a professional-looking shiny edge that’s great for product photography.
Cinematic Portrait Lighting
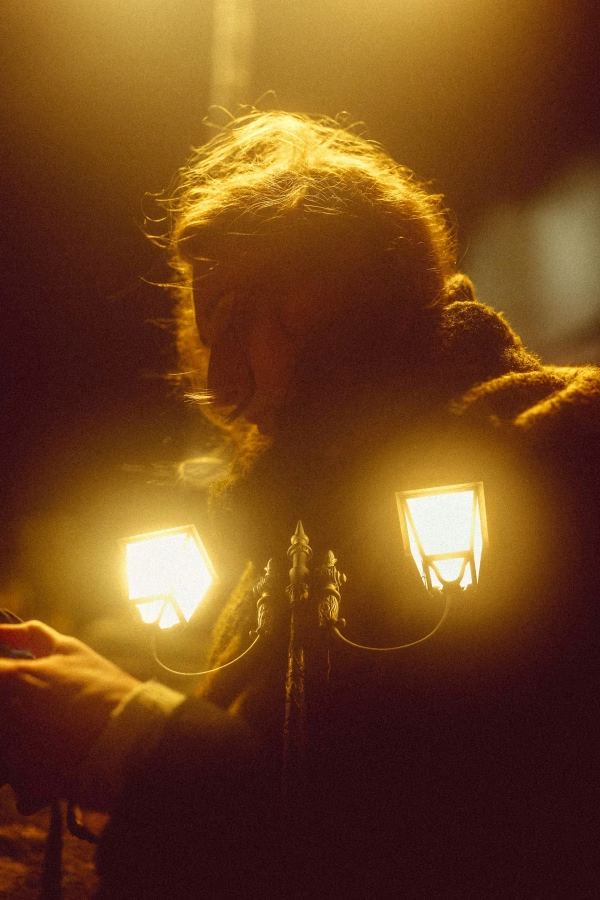
As mentioned, rim lighting visually separates the subject from the background, which is why it’s often used in filmmaking, especially in low-light settings.
Hence, you can use rim lighting to create a very cinematic look like in this picture:
Sports/Action Shots
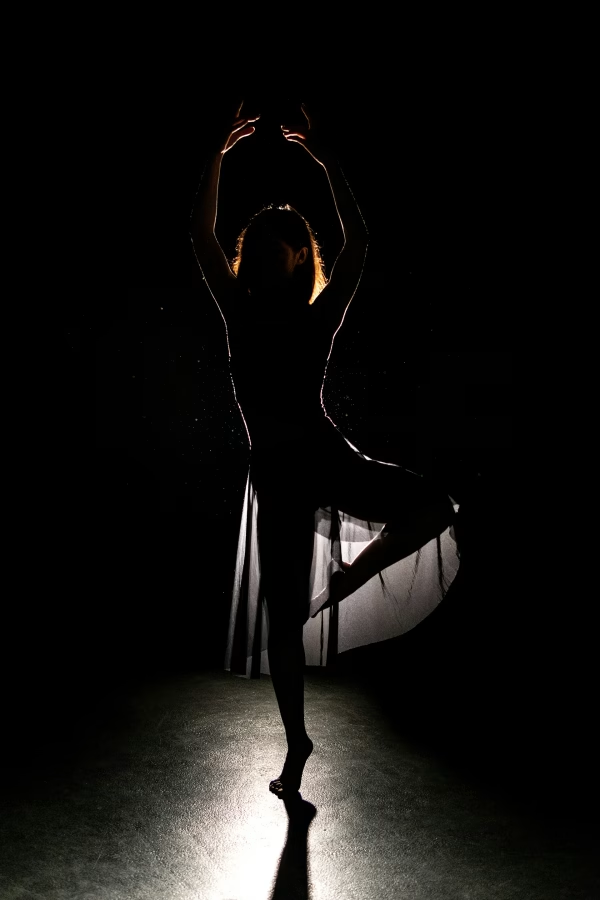
Since rim lighting emphasises shapes and contours, it’s also particularly great for capturing sports and action shots.
Try it to highlight shapes, muscle definition or motion in sports like running, dance, or martial art:
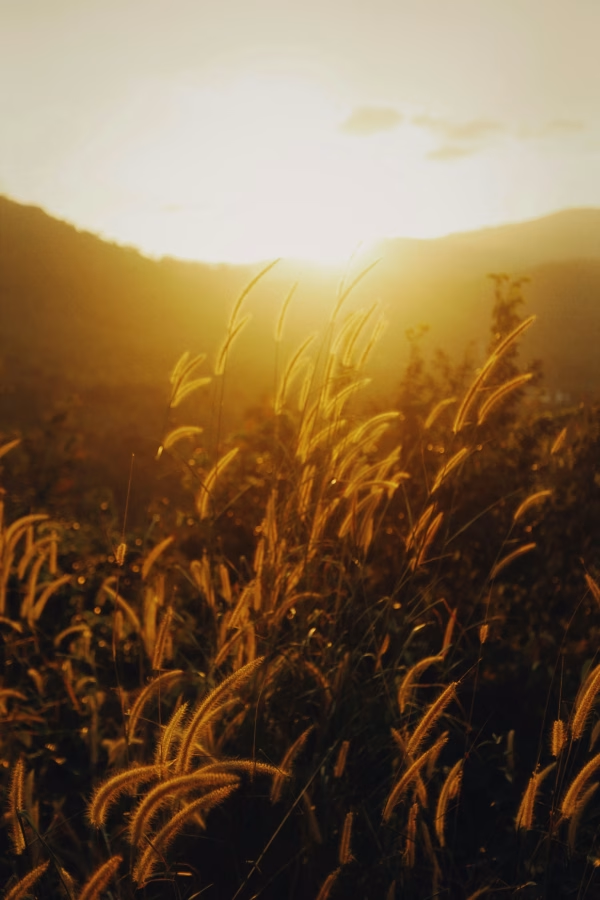
Wildlife/Nature Photography
In outdoor photography, you usually don’t use artificial lighting but rely on the sun.
Try shooting animals, plants or water droplets during the golden hour, when the sun is low.
This creates a natural rim light that highlights details like fur or feathers, making the image look soft and dreamy:
5. Common Mistakes & How to Fix Them
Rim lighting is actually a fairly easy lighting technique.
However, there are still some common mistakes to look out for.
Here’s what they are and how to fix them:
Blown-out Highlights
The main issue you can get with rim lighting is blown-out highlights.
These are areas in the picture where you have too much light, resulting in loss of detail.
Usually, this will happen if the light is either too intense or too close to your subject.
How to Fix It
Move the light source further away from the subject or decrease the light intensity by adjusting the settings or using a diffuser.
You can also use modifiers like a honeycomb grid or barn doors, which will restrict the light from specific areas.
Edge Effect is Too Weak
Next, you may have the issue that the separation of the subject from the background isn’t strong enough, and you don’t get that hallmark glowing edge.
This can happen when the background is too bright or you’ve placed the light in the wrong position.
How to Fix It
Try adjusting the angle of the rim light until you can see the luminous edge around the subject.
You could also modify the background: Make it darker or use a contrasting colour, as this will make the rim light more pronounced.
You can also move the subject further away from the background.
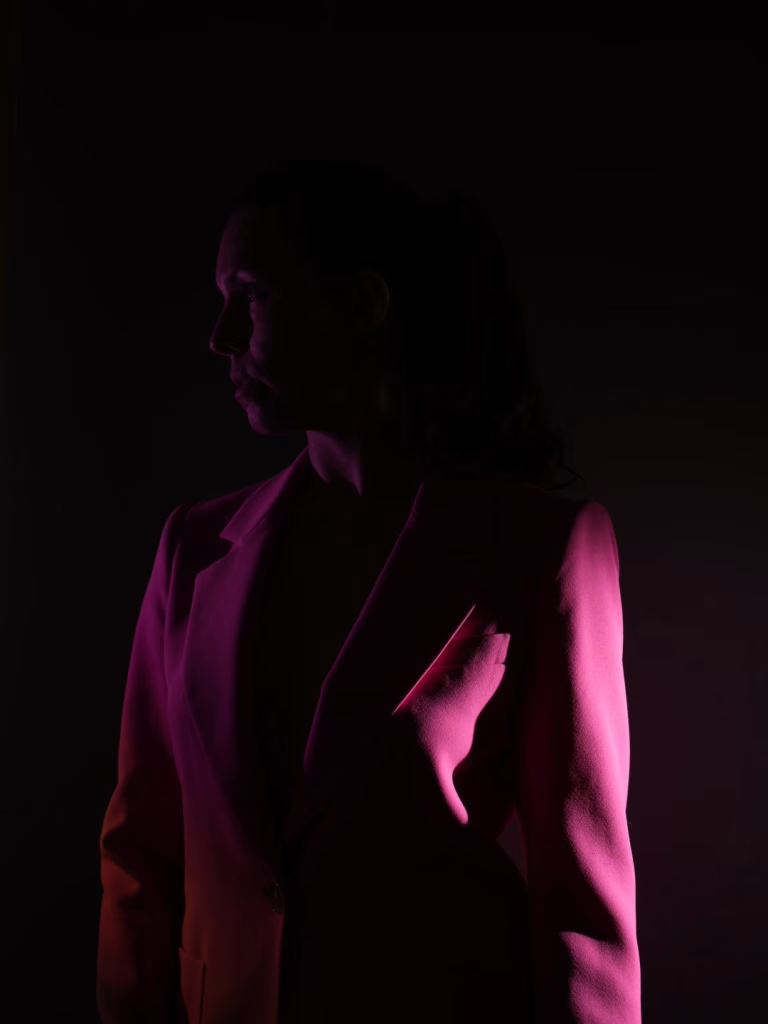
Uneven Lighting
Sometimes, you may get uneven lighting where one side of the subject appears much brighter than the other.
Here’s an example:
How to Fix It
To fix this, try adjusting the angle and position of the light.
Alternatively, you can use an additional fill light or a reflector on the darker side. This will help brighten up shadows.
If you know how to use Photoshop, you can also use a Curves adjustment layer with mask to adjust the highlights and shadows of the brighter side.
Unwanted Lens Flare
Finally, you may run into the problem of lens flares if the light is placed opposite the camera lens.
I actually quite like lens flares, but if it’s not the effect you’re going for, try these tips to fix it:
How to Fix It
You can use a lens hood to block unwanted light from hitting your camera lens.
Alternatively, try using barn doors to shape the light and prevent it from spilling into the lens.
If you don’t have studio gear at home, you can even use a piece of black foam board or cardboard for this.
You can also adjust your camera angle to minimise flare.
Hopefully you’ve found this deep dive into rim lighting useful!
If you want to support me and help me keep my content free, you can buy me a coffee by hitting the button below!