
Conceptual Self-Portraits: Turn Your Ideas into Powerful Images
I hope I haven’t put you off with the title of this article because let’s face it…
”conceptual” sounds pretty grand and, honestly, a little pretentious.
But hear me out!
I’m not exaggerating when I say that working more conceptually has been the best thing I’ve ever done for my photography.
Why?
Because it has made my images much more interesting, evocative and powerful.
The thing is, when you develop some kind of concept for your photos, they tend to have more depth.
They’re not just “pretty” but actually tell a story and offer an insight into your imagination, which makes the extra effort well worth it.
What’s in This Post
In this week’s blog post, I explain my four-pronged approach to developing a concept for self-portraits.
In the second part of the article, I will share three images and explain the idea-generation process for each.
Let’s get started!
Part 1: My Four-Pronged Approach to Conceptual Self-Portrait Photography
In the first part of this article, I will explain how I develop ideas and concepts for my self-portraits.
I’ve tried to simplify the process into four streamlined steps, but your process may look slightly different depending on how your mind works and what inspires you.
Either way, let the following four steps be your starting point – an example method for concept development that you can adjust to your individual preferences.
1) The Initial Inspiration
At the beginning of each photoshoot concept, there will be some initial inspiration.
This is not something that can necessarily be forced:
It’s hard to sit on your couch and suddenly come up with a super inspiring idea.
However, you CAN do many things to get your creative juices flowing.
Here are some ideas:
See Some Art
Go and see some art. This doesn’t have to be photography – it could be something unrelated, like paintings, sculpture, or handicrafts.
I’ve even been inspired by visiting a science museum before, so don’t limit yourself to art-related exhibitions and museums.
Watch a Movie
Watch a movie – ideally in a genre that you’re not familiar with.
Examples include science fiction, animé, film noir or whatever you don’t usually watch.
Get Inspired by Literature
Read a classical novel or poems by a famous writer known for their expressive language, such as Proust, Fitzgerald, Yeats, Dickens, or Garcia Marquez.
This is one of my favourite ways to get inspired. I also work as a translator and love beautiful words!
Go on an Adventure
This could be an actual short trip/holiday or just a walk in an unfamiliar area.
Listen to Music
Listen to some music; ideally with headphones and totally uninterrupted.
Generally, I’ve noticed that inspiration is often found in unfamiliar places.
If you do the same thing every day, you may have a hard time generating ideas.
A routine like going to work, driving the same way there and back, then watching your favourite TV show or going to the same restaurant doesn’t give your brain many new impulses.
Instead, try to expose yourself to new, unfamiliar things, sights and experiences, and you’ll massively increase your chances of getting new ideas.
How I Get Ideas
Personally, I’ve noticed that most of my ideas come from:
- My own emotions – I often process emotions by turning them into a conceptual self-portrait
- Words – as mentioned above, I love words, and I keep a little digital notebook of beautiful words or expressions I come across
- Photography and art exhibitions – I often get inspired by artworks, in particular specific colour schemes or an interesting composition
- A particular aesthetic or concept that I come across on social media or in an exhibition. For example “pink, feminine”, “glossy, editorial”, “sensual, red, sexy”, etc. You notice that this has a lot to do with colours and textures – for some reason, those are quite inspiring to me.
Before I get to the next section…do you need some inspiration for your self-portraits? Then check out my free ebook:
Free Ebook-50 Self Portrait Photography Ideas
Do you love self-portrait photography, but lack inspiration for your shoots? Then download my e-book with 50 ideas for self-portrait photography!

…but now, back to the blog post!
2) Deepen Your Idea
The next stage in my conceptual approach to self portrait photography is something I call “deepening your idea”.
Let me explain this quickly, based on the example below (one of my self portraits):
My original idea was to portray myself as a sort of feral, wildcat-like woman.
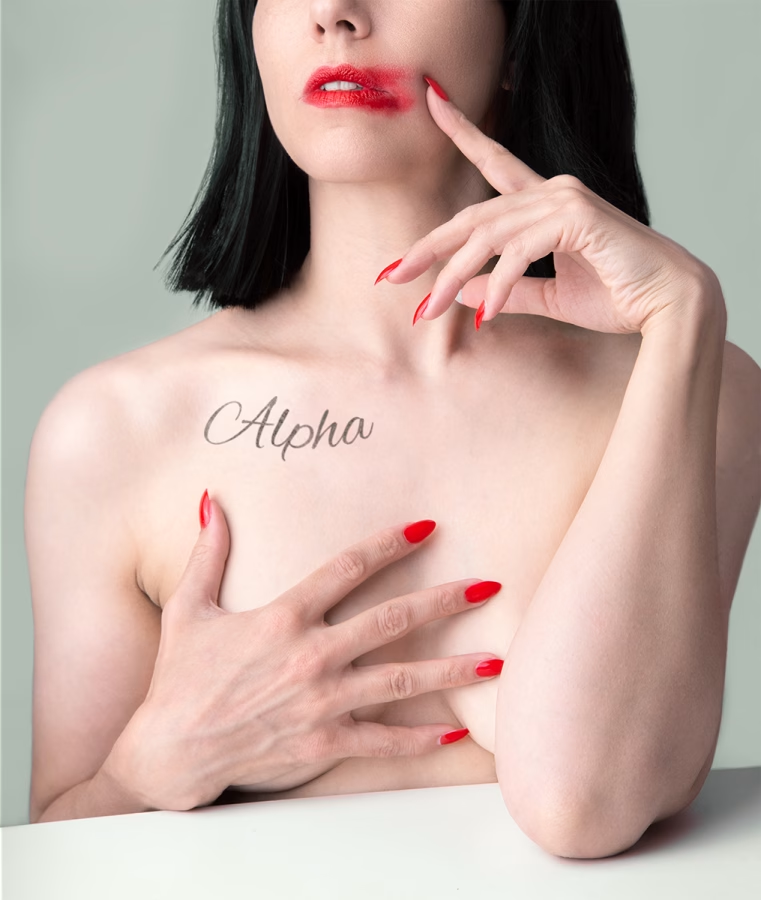
Now, without “layering inspiration,” I may have added some obvious wildcat references—tiger makeup, a panther tattoo, or something similar—but that would have kept the idea quite flat and literal.
Instead, I “deepened” the idea by approaching it in a more abstract way.
I added red fake nails, symbolising claws, and smudged red lipstick, symbolising blood from the “prey” I just (metaphorically) devoured.
It certainly makes the image more challenging to read because the inspiration is a bit more hidden.
At the same time, it gives it more complexity and depth (and therefore makes it more interesting).
Strategies to Deepen Your Idea
There are several strategies to deepen your idea and create a more layered concept.
In general, try to not go with your first, most obvious idea.
Instead, brainstorm how you can express that same idea in a more complex, less literal way.
Here are some tips to help you with this:
Use Symbolism
This is a very powerful tool to express complex ideas in a visual way.
If you need help with this, read my recent article dedicated to symbolism in photography.
Use Colours
Colours are heavily associated with different emotions, which can be very helpful when creating your photo shoot concept.
You can use props, make-up, backdrops, clothing or even coloured filters in your chosen colour.
Examples include red symbolising love (but also anger) or blue symbolising sadness. Google “psychology of colour” if you want to learn more about the topic.
Think Outside the Box
Try to think outside the box, combining elements that aren’t usually associated with each other.
For example, I recently took a self portrait in a wedding dress (normally a symbol of love and happiness), wearing it like a straight jacket.
This was meant to symbolise a feeling of constraint or being trapped.
It works visually because it’s very unusual to see a wedding dress used in this way, creating surprise in the viewer.
When developing your concept, play around with opposing elements or ideas, as it can lead to really interesting photos.
Experiment with Different Techniques
Experiment with different photographic compositions and techniques to deepen your concept.
For example, use a slow shutter speed to create motion blur, underscoring the feeling of despair or sadness in your image.
You could also frame your subject as a small figure in a large frame to symbolise loneliness, etc.
3) Research/Visual Development
The next phase in my four-pronged approach is a research phase to make my concept more tangible.
By the way, step 2 and 3 in my idea finding phase often happen at the same time, so you don’t necessarily have to do one after the other.
So, What Do I Mean by Research Phase?
Basically, once I have an idea for a photo shoot and know in which direction I want to take it, I go on Pinterest and look at some images to get ideas for composition and framing.
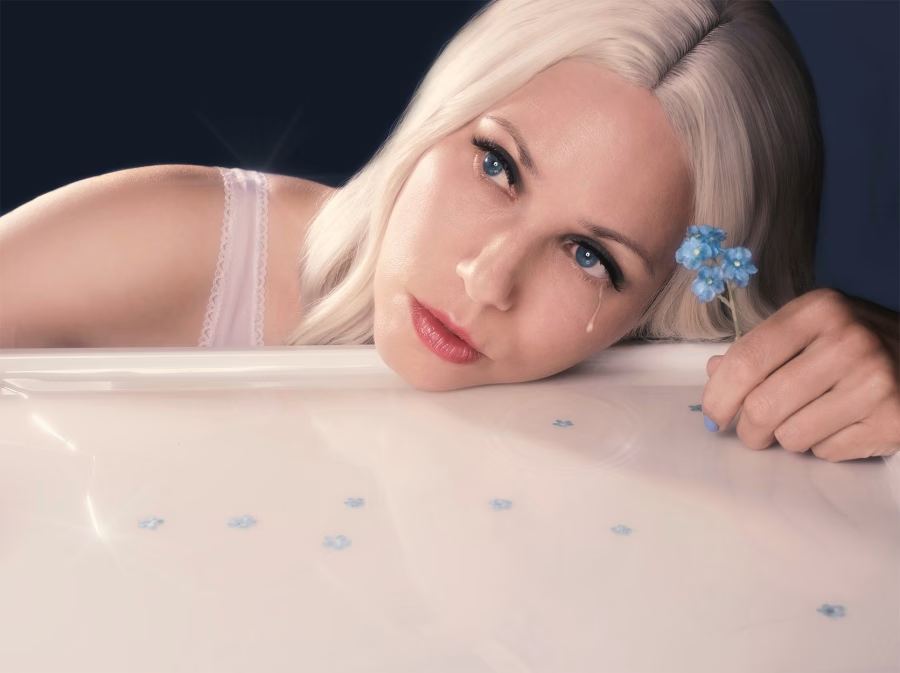
For example, I recently took a self portrait where I’m crying in the image, and I wanted to achieve the effect as if my tears had formed a puddle.
I wasn’t sure how to best pose in the picture.
Hence, I went on Pinterest and searched for portraits where the face was reflected in water or a mirror (I literally typed in things like “portrait water reflection”).
I then created a little moodboard with poses I liked.
Here are some of the photos I saved at the time:
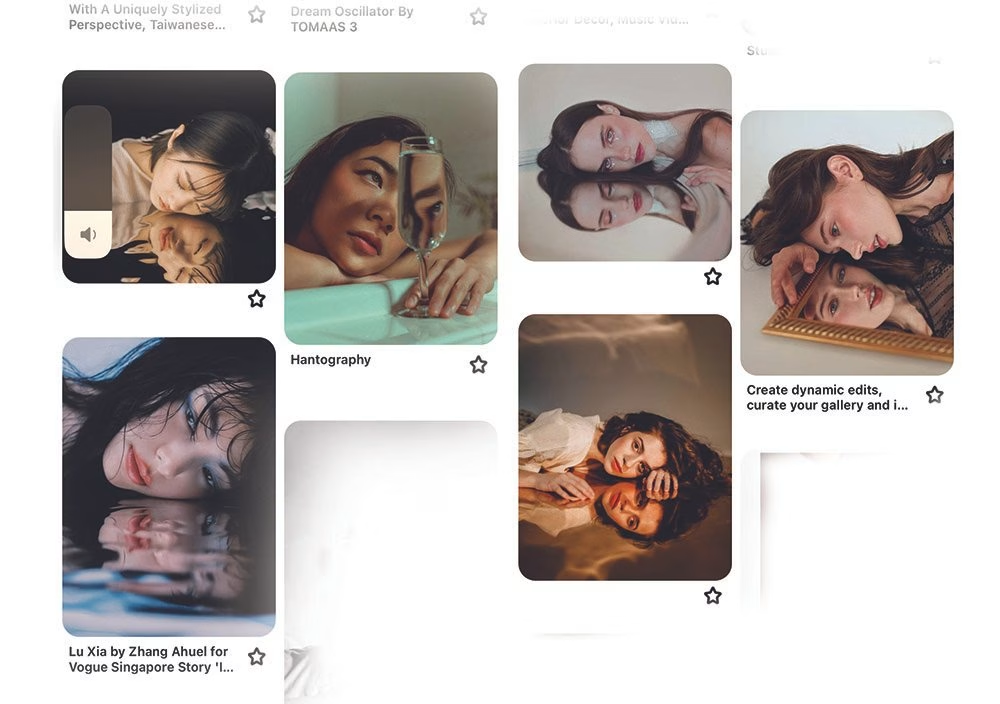
You can see that I really like the images where the model was laying with their face sideways, so in my own picture, I eventually recreated that pose:
I think the research phase is really important for several reasons:
- You can find a concrete pose you like, which you can then recreate in your shoot. This is particularly great if you’re new to self portraits and heed help with posing
- It will give you lots of inspiration, especially in regards to colour scheme, composition, framing and general mood/aesthetic of your picture
- It will show you how different people have realised the same or a similar concept. You can then integrate elements you like into your own idea and dismiss the parts you don’t like (but of course, never copy anything directly).
Obviously, you don’t have to do this in Pinterest, you can also use a search engine or photography books and magazines.
I just like Pinterest because it’s so user friendly 🙂
Once you’ve looked at a good amount of images and have some more concrete ideas of how you’d like to realise your image, you can start to plan your shoot!
4) Taking the Picture
Yay, you’ve made it!
You’ve transformed an initial inspiration into a more layered concept and (hopefully!) have a concrete plan for your self-portrait shoot.
Now, it’s time to organise everything you’ll need (backdrop, props, make-up, etc).
I often use quite random props or tools for my shoots (recent purchases include black food colouring, a toy pirate ship, and a flower headdress!).
I always order them online and then get going as soon as I’ve gathered everything I need.
Next, all you have to do is set up your camera (and lighting, if using.
If you need guidance on lighting your self-portraits at home with DIY/basic studio lighting, read my recent post here).
Then, take a good amount of pictures, referring back to your reference pictures if needed.
If you need help getting the focus right and other technical aspects of self-portrait photography, read my article here.
Part 2: Examples of Conceptual Self Portraits + My Thought Process
Finally, I want to show you three more examples of my conceptual self-portraits and explain the thought process behind them.
Let’s start with this one:
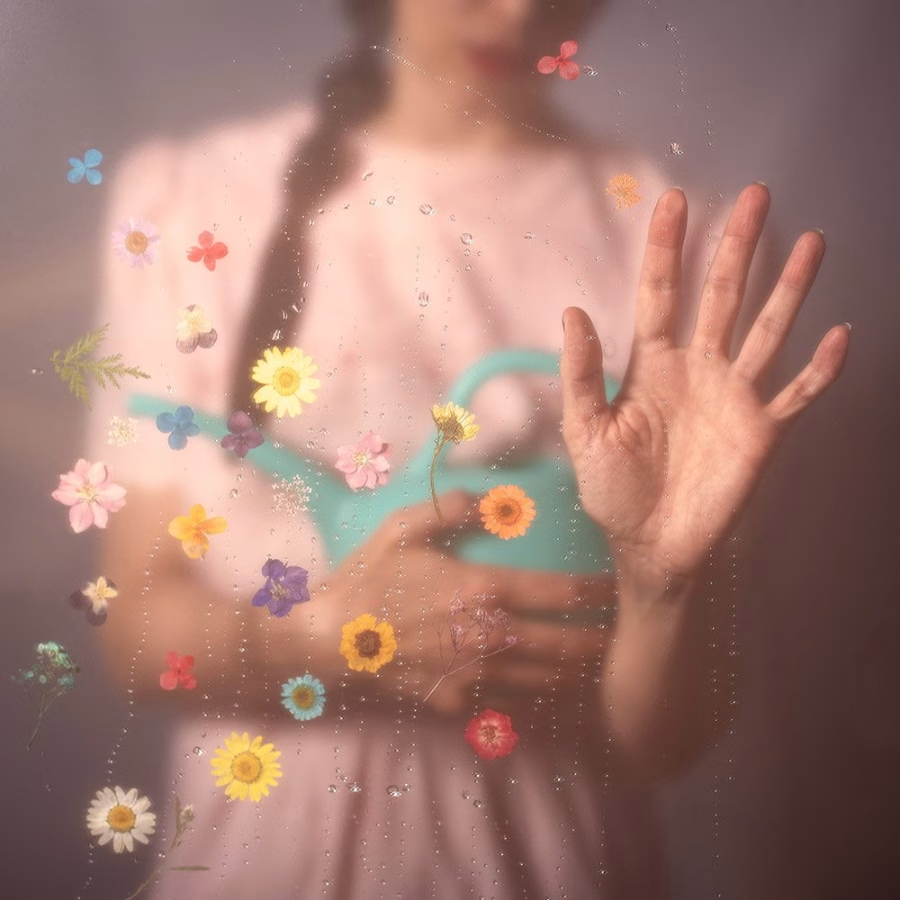
This photo was actually inspired by the word “Dreams”.
Ironically, the idea came to me in bed at night, when I couldn’t sleep!
You know how in dreams everything is possible?
Well, in this photo, I wanted to illustrate that idea, and I remembered I had some dried flowers in my prop drawer that I had never used.
So, I decided to illustrate that “impossibility “ element of dreams by putting the flowers in front of a glass panel.
I would be standing behind the glass (meaning I technically wasn’t able to reach them, nor water them with my watering can).
However, because it’s a dream, the flowers are blooming anyway (rather than drying out).
I used the flowers and watering because I liked their symbolic meaning.
I also used a soft focus filter, which creates a very soft, romantic aesthetic, underscoring the idea of this being a dream.
Here’s the next photo:
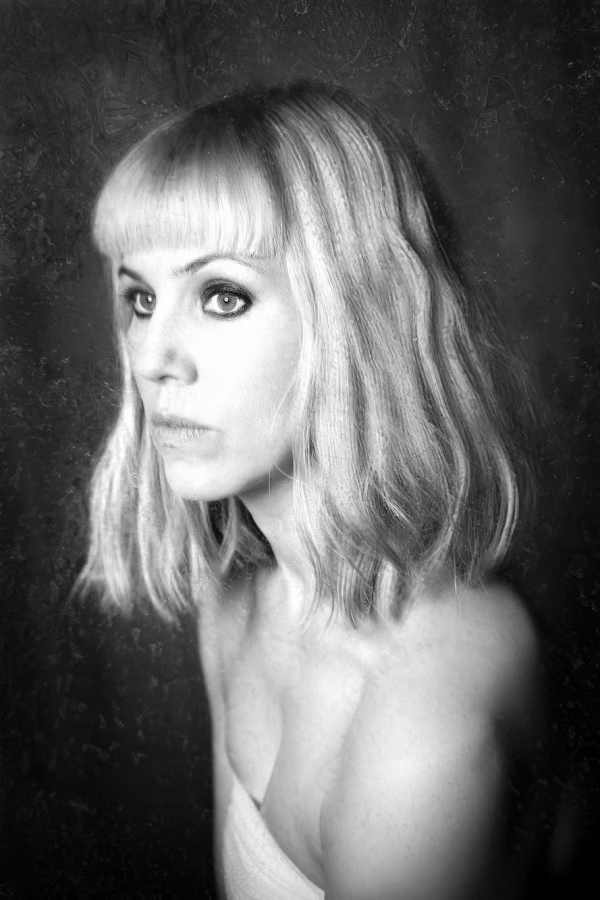
The original inspiration for this photo was my (ongoing) struggle with chronic pain in my elbow, meaning that I wasn’t able to draw or pursue other hobbies.
I decided to use a medical bandage as my top, symbolising the idea of sickness.
I also came up with the idea of a “creative frost” – at the time, I felt like I wasn’t able to express myself creatively at all, which was very upsetting.
As a symbol for the frost, I used actual ice – I printed my portrait, put it in the freezer and then re-photographed it to create the icy texture.
Finally, I converted the photo to black and white, further emphasising my sadness and distress (don’t worry, I’m OK! :-))))
And here’s the last one I wanted to show you:
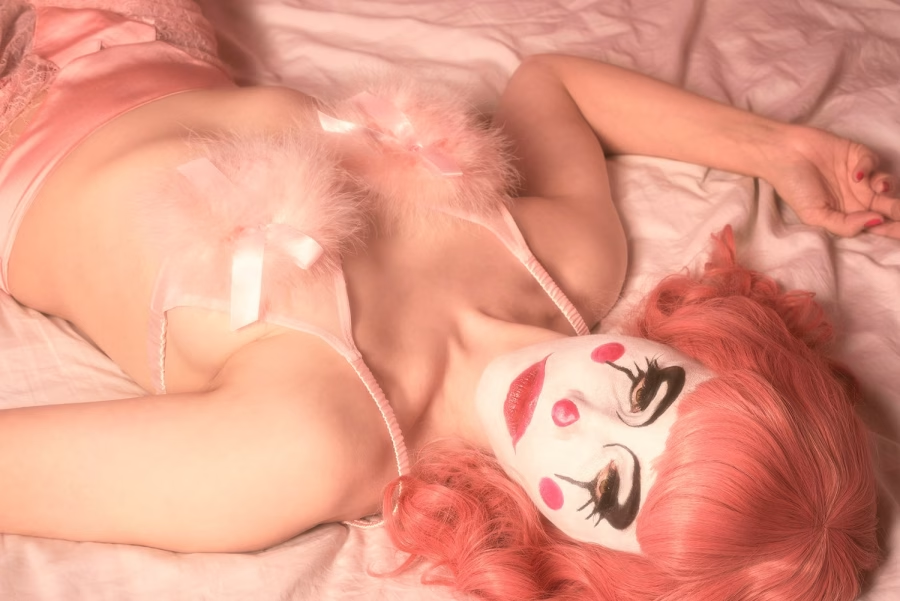
My original inspiration for this photo was actually another photo which had a very feminine, soft-pink aesthetic, so my original intention was to create a self portrait with that same dreamy, retro-pink look.
Around the same time, I had also watched a Youtube video about someone going to clown school, so that had somehow stuck in my head!
I then came up with the idea of pairing the sad clown make-up with the character of a sensual, but at times insecure woman.
In this case, the clown make up symbolises the awkwardness women can feel in relation to femininity and intimacy – sometimes, you may feel used, exploited or some other kind of negative emotion.
Styling and Editing
When I thought about how to dress for this photo shoot, I purposely went for this beautiful pink lingerie and pink wig because I found the contrast to the sad clown make-up quite interesting.
I also decided to pose lying down in a more passive position, to underscore the meaning of the photo (being used or taken advantage of).
Finally, I did some colour grading in Photoshop, really emphasising the pink tones in the image in reference to the original inspiration and the topic of femininity.
(If you need some help with colour grading, check out this post).
That’s it for today’s article!
If you want to take your self-portrait photography further, check out my ebook below:
My Ebook: The Self-Portrait Guide!
Would you like to learn more about self-portrait photography? Then check out my ebook now! Topics include:
- how to use natural and artificial lighting
- essential gear you’ll need for self-portraits at home
- idea-finding techniques to develop concepts for photo shoots
- how to edit, export and print your images, and more!
