
Do you want to learn timeless portrait photography lighting techniques that don’t require expensive gear or a professional studio?
Then keep reading because in today’s post, I share five easy, beginner-friendly portrait lighting techniques you can recreate at home.
When I was studying photography, I noticed that there was a big fear of artificial light and portrait lighting in general.
Everyone was happy and comfortable using daylight/natural light, but when it came to lighting portraits indoors using tools such as softboxes, people got very intimidated.
I totally understand that artificial lighting can seem scary:
First of all, there are so many different types of lighting and lighting setups, which can be very overwhelming.
Second, a lot of portrait photography lighting techniques require fancy equipment, like studio strobes, reflectors, or light modifiers.
However, these are all optional.
For most portrait lighting techniques, you only need one light source, and there are lots of DIY alternatives for pro tools like softboxes.
In this post, I share five truly timeless photography lighting techniques that will give your portraits that studio look.
I have tried and tested all of them in my “home studio” (my living room!), so I know they work well even with limited gear or experience.
Let’s start with my absolute favourite portrait lighting technique.
This one is a true classic and was often used in Old Hollywood: Butterfly Lighting.
1. Butterfly Lighting
Have a look at this portrait of 1940s Hollywood star Marlene Dietrich:
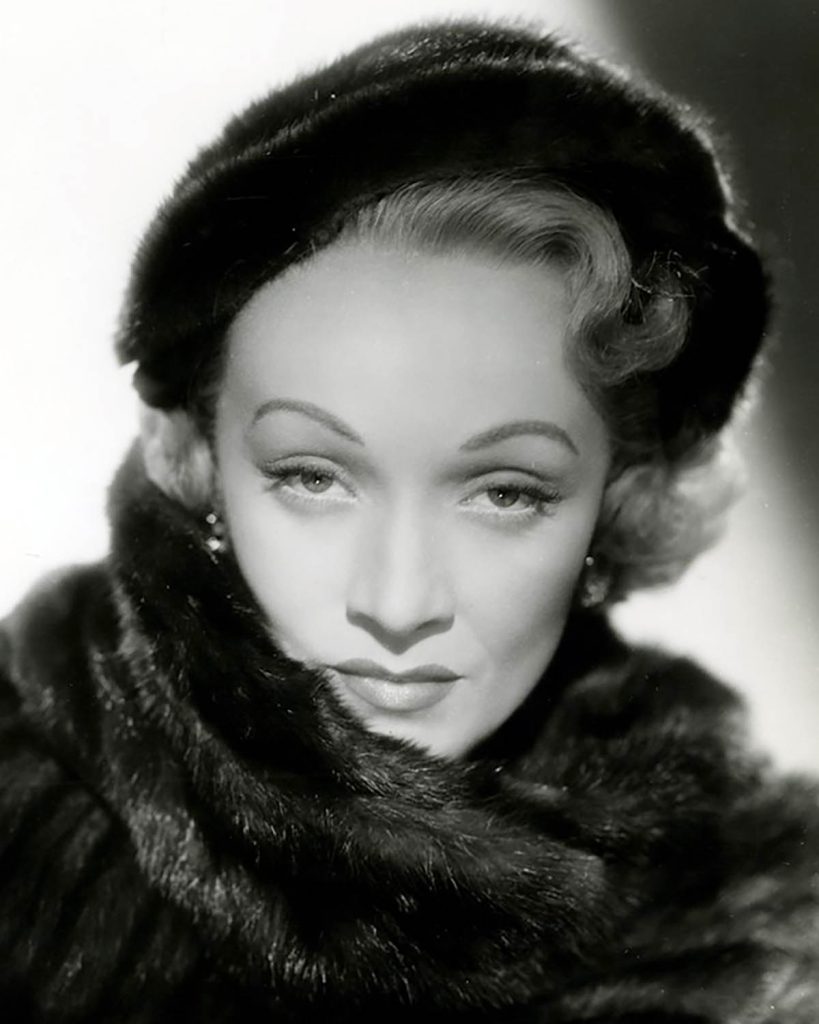
Marlene Dietrich. Twentieth Century Fox, Image Credit: Wikimedia Commons.
This portrait is the perfect example of butterfly lighting.
You can identify it by the butterfly-shaped shadow under her nose.
By the way, this technique is also called Paramount lighting, since it was often used for portraits of movie stars.
Why I Love This Technique
Butterfly lighting creates a very flattering, symmetrical light that enhances cheekbones, defines your subject’s facial structure, and reduces shadows under the eyes and chin.
That’s also why it’s still a favourite in beauty and glamour photography!
Butterfly lighting is ideal for portraits where you want your subject to look confident and elegant.
As opposed to some other lighting techniques in this post, this one doesn’t create any moody shadows or dramatic side-lighting; rather, it’s a very glamourous setup (hence its use in Hollywood).
Gear You’ll Need
For this portrait lighting technique, you only need one light source.
The light must be very soft and diffused to create that flattering, even light.
If you have it, you can use a light source with soft box, or a ring light.
Otherwise, try a household lamp with DIY diffusion in front of it.
White nylon curtains, thin white fabric, a white curtain, or even white paper all work well for this.
How It Works
Set up your light source directly in front of your subject, and raise it slightly above eye level.
Then, angle it down towards their face at about 45°.
Position your subject so that the light casts a subtle butterfly-shaped shadow under the nose (but not across the lips or chin).
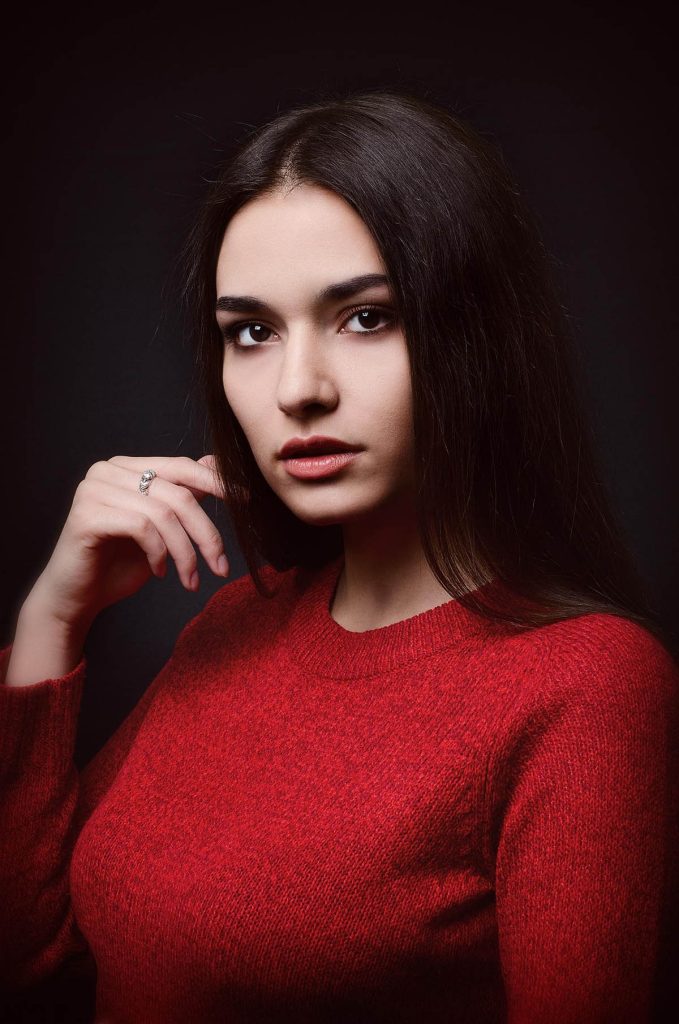
Portrait Using Butterfly Lighting.
Before I get to the next portrait lighting technique…did you know you can download my free portrait photography ideas ebook? More info below:
Free Ebook: 50 Portrait Photography Ideas
If you need fresh inspiration for your portrait photography, download my e-book which contains 50 creative ideas and projects for portrait photography.

…but now, back to the blog post!
2. Painterly Portrait Lighting
Next, let’s talk about another one of my favourite portrait lighting techniques: painterly lighting.
What do I mean by that?
Well, look at the lighting in one, if not the most famous painting in the world:
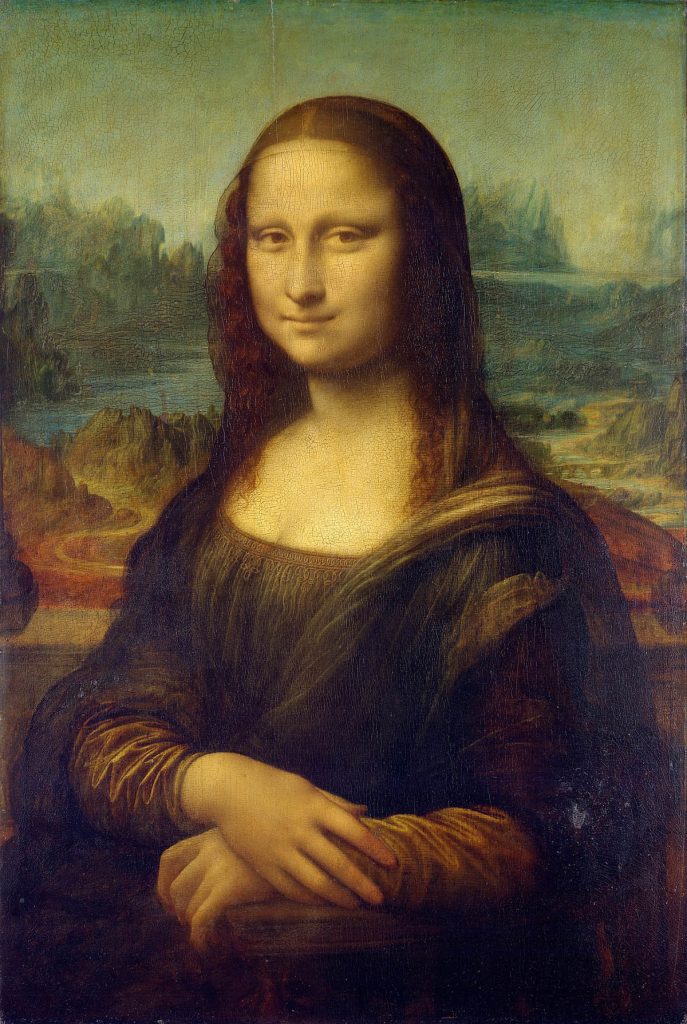
Mona Lisa, by Leonardo da Vinci.
You can see that the light here has a very particular quality; it’s soft and diffused, making her skin look luminous.
However, at the same time, there are very dark areas in the painting, creating a three dimensional, high contrast effect which is typical for classical portrait paintings.
Here’s another beautiful example of beautiful painterly lighting:
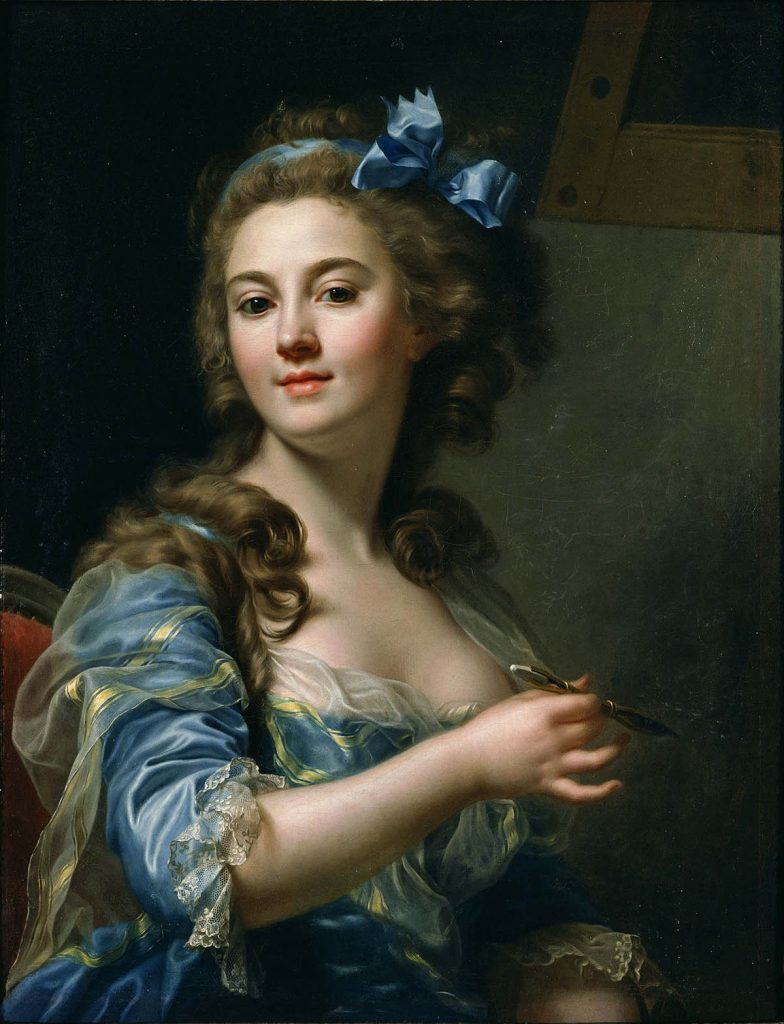
Marie-Gabrielle Capet, Image Credit: Wikimedia Commons.
Again, look at the luminosity of her skin-she looks almost like a doll.
The lighting is diffused, but you still have a lot of volume and depth in the image, creating that typical painterly look.
If you’re not sure what I mean, compare it to this photograph with very even high key lighting:
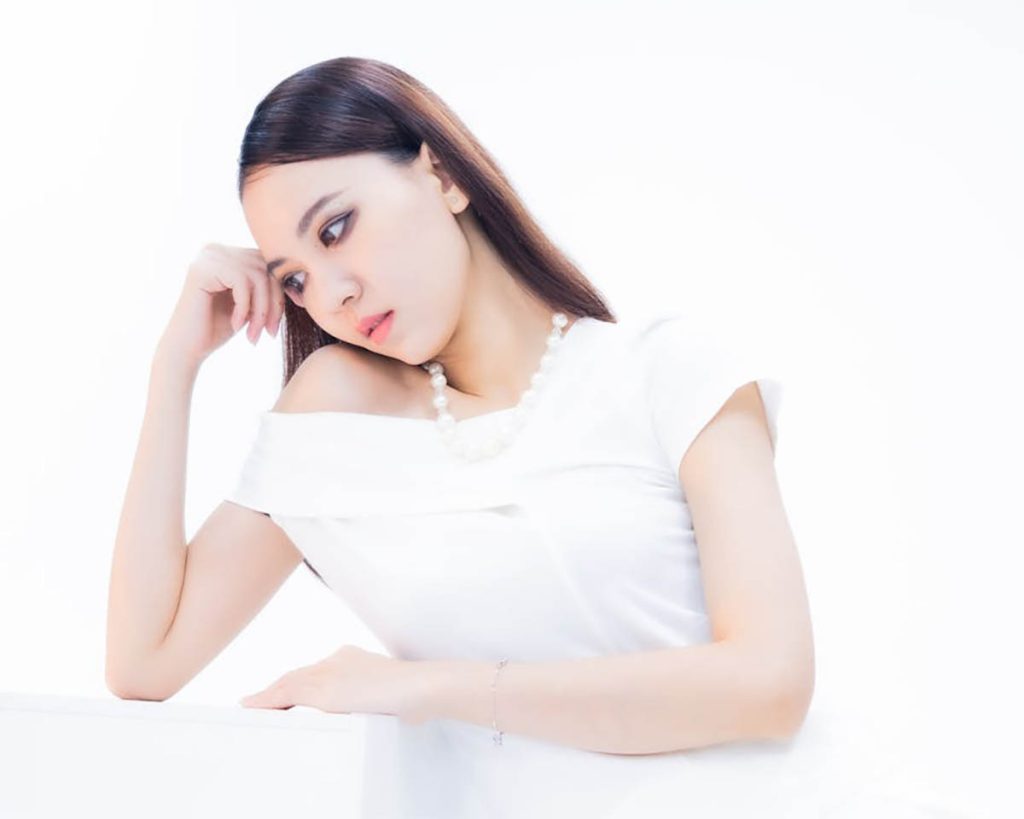
Image Credit: Quý Nguyễn.
In this image, the photographer used very soft, diffused light and most likely either a reflector or another light source to brighten up shadows.
Hence, the light is very flat; it neither has harsh shadow areas nor strong contrast.
But back to painterly lighting and how to create that beautiful painterly glow in your portraits.
Gear You’ll Need
To create painterly lighting, you have two options: using natural window light or an artificial light source with a so-called honeycomb grid.
Using Window Light
If you’re using window light for your painterly portrait, find a large window with indirect lighting.
This is important: You don’t want to shoot in direct sunlight because the light will be harder and less diffused.
Ideally, use a north facing window, or a window with a sheer curtain.
Then, place your subject at an angle to the window, so you get some areas of deep shadow on their face and body.
Here’s an example of a self portrait I shot in this way:
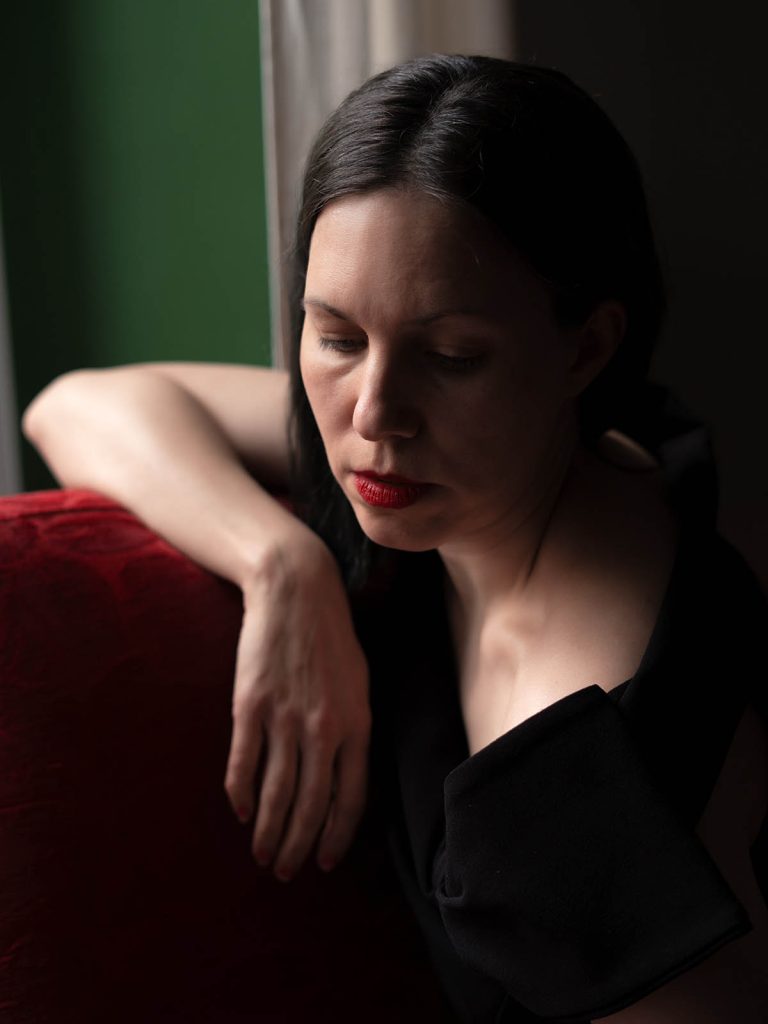
You can see that the light has the same quality like in the paintings above:
It’s soft and flattering, but at the same time retains lots of shadows, creating three dimensionality.
Using a Honeycomb Grid
The other option you have for creating painterly portrait lighting is to use a light with honeycomb grid.
This is a light modifier commonly used in photography, film, and theatre lighting that controls the light’s spread and direction.
It looks like this:
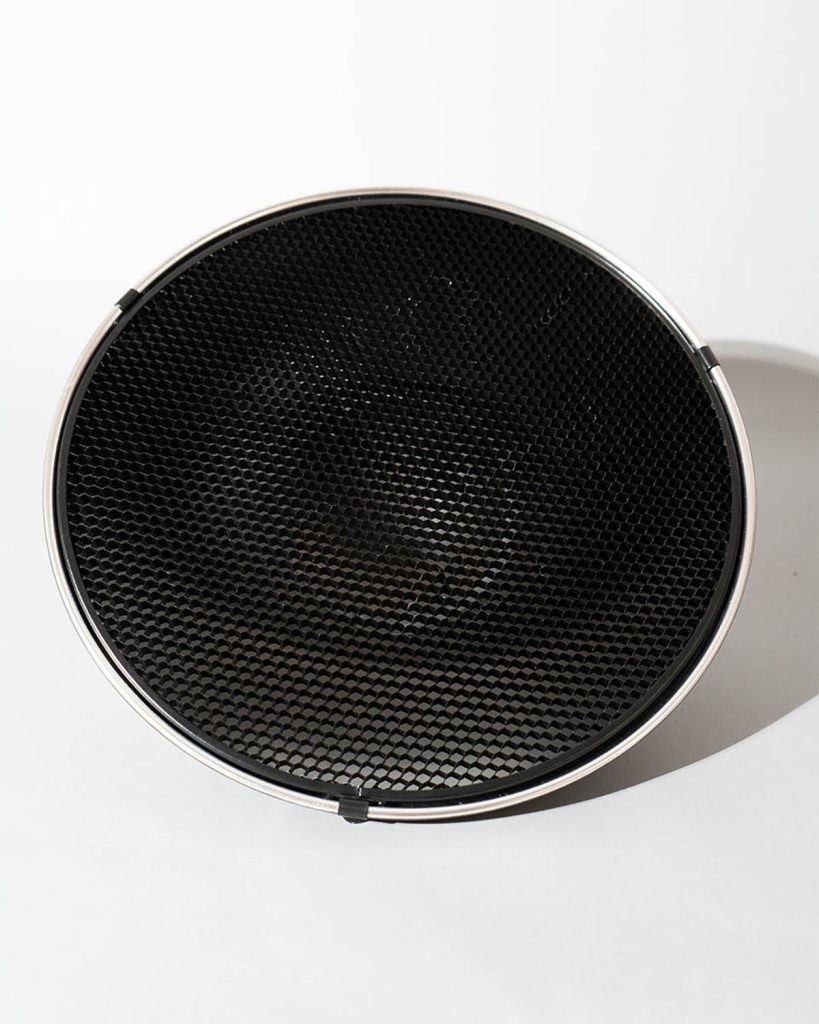
If you happen to have an artificial light source at home, you can buy a honeycomb grid attachment for just a few dollars.
I think it’s a worthy investment, as it creates such a beautiful lighting.
Here’s an example of a self portrait I took with honeycomb grid:
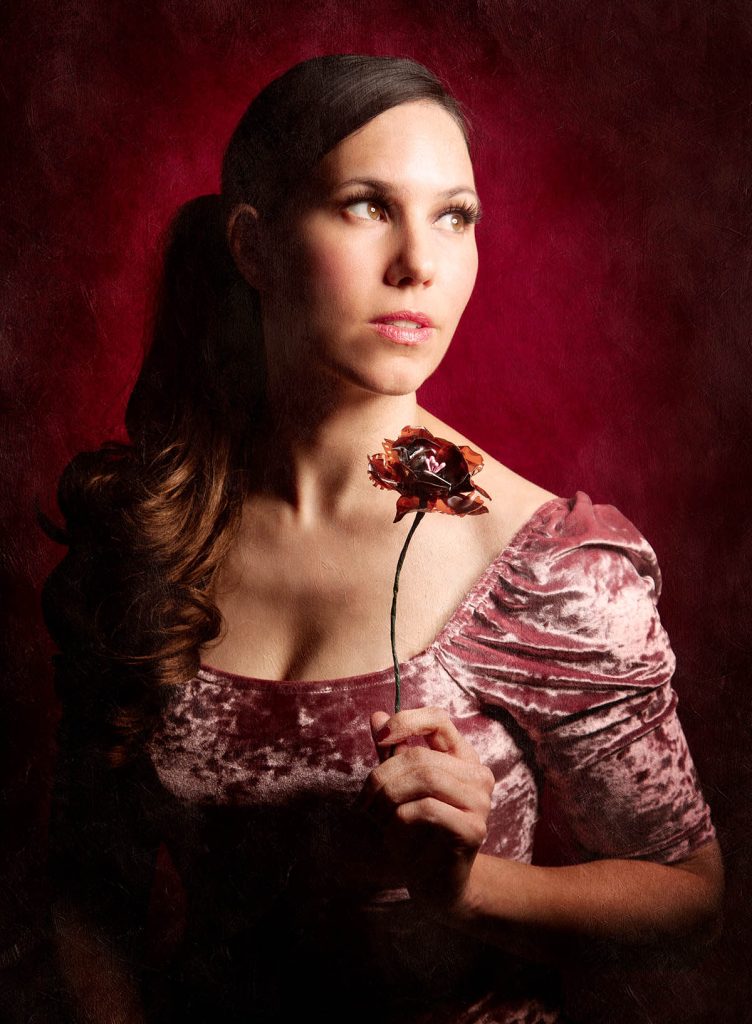
Again, you have that luminous skin, coupled with dark shadows and little light on the background or surroundings.
Let’s now move onto the next portrait photography lighting technique: split lighting.
3. Split Lighting
Split lighting is truly one of the easiest portrait photography lighting techniques ever.
Simply put, it refers to a lighting set-up where only half of the face is lit and the other half is in shadow.
Here’s an example:
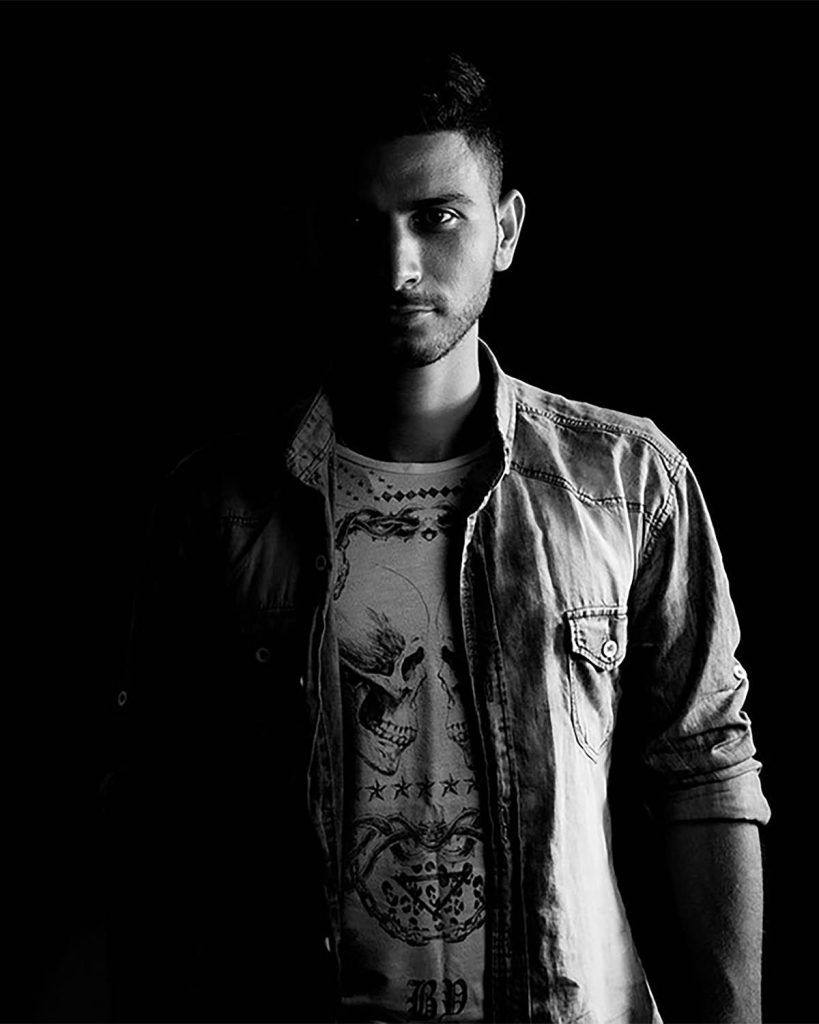
Image Credit: Pexels.
Split lighting is probably not a technique you would use for classic beauty or commercial portraits.
Instead, it’s great for dramatic lighting setups in which you want to create a sense of mystery or intensity.
What I like about this lighting technique is that it creates a visual contrast between light and dark, which is quite striking (and perfect for cinematic or storytelling photography).
This technique is also particularly effective in black-and-white photography because it enhances the play of light and shadow.
Gear You’ll Need
For this setup, you only need one light source.
This could be a strobe or continuous LED light, a household lamp, or even a window.
If you want to brighten up the shadows in the darker side of the face, you can use a reflector or white foamboard to bounce some light back onto it.
However, I prefer to keep the lighting very contrasty as I like the mysterious effect this creates.
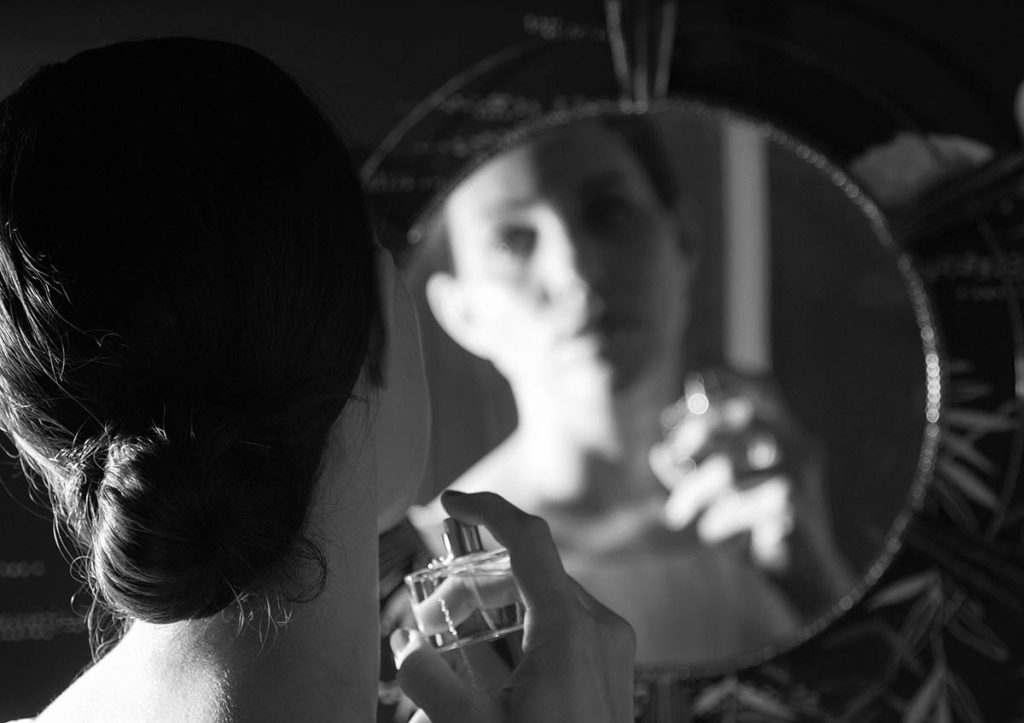
One of My Self Portraits Using Split Lighting.
How It Works
As mentioned, this is one of the easiest portrait photography lighting techniques!
All you need to do is to place your light 90 degrees to one side of the subject (left or right).
The centre of the light should be at eye level or slightly above.
Then, angle the light so that half the face is lit, the other is in shadow.
You can move the light closer for softer light or further away for harder, more defined shadows.
4. Clamshell Lighting
Next, let’s talk about another absolute favourite of mine: clamshell lighting.
This technique may have a slightly fancy name, but it’s again very easy and beginner-friendly while delivering incredibly pro-looking results.
Here’s a self portrait I took using clamshell lighting:
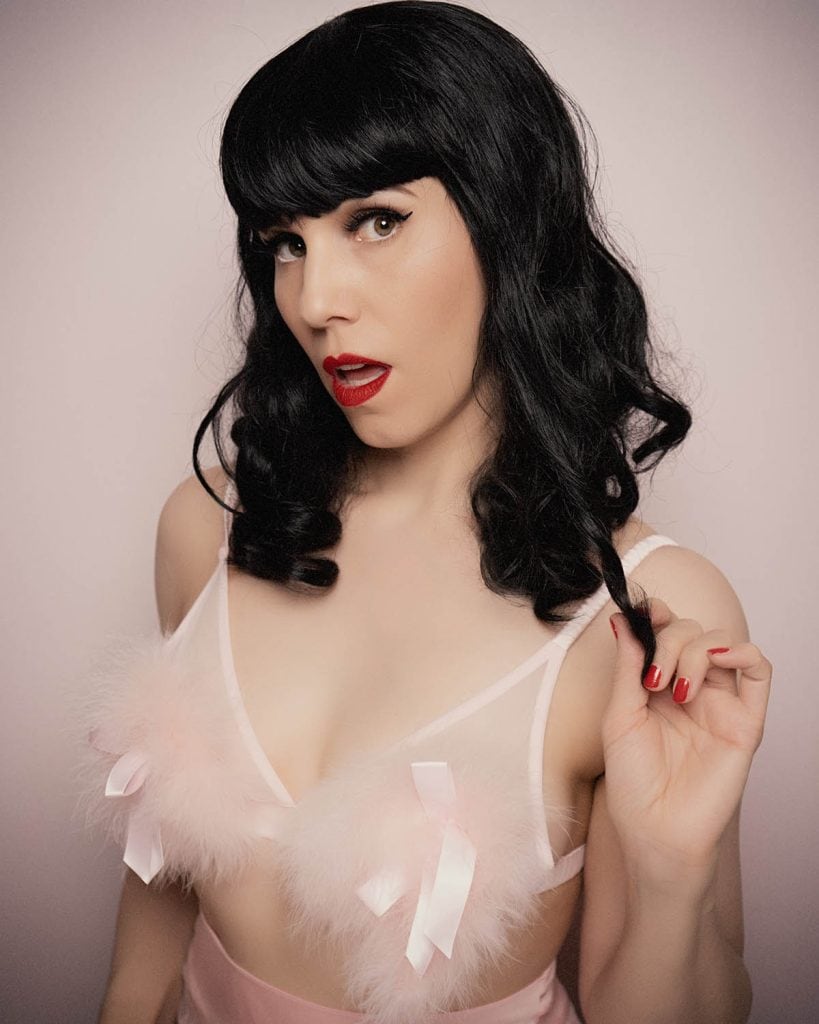
You can see that the light in this image is very soft and flattering.
There are no harsh shadows anywhere, even on my neck.
That’s because this lighting technique uses light from above and below to soften shadows and create a very diffused effect.
Not surprisingly, this is a very popular choice for beauty, fashion and boudoir shots.
Gear You’ll Need
For this lighting setup, you will need one main light source with soft, diffused lighting.
Ideally, this would be a strobe (flash) or a continuous light combined with a softbox (in the picture above, I used a medium-sized octagonal softbox).
However, as mentioned above, you can also use a regular lamp with DIY diffusion material in front of it.
The second piece of gear you’ll need is either a reflector or any solid white material you can use to reflect light back onto your subject, like a piece of white foamboard or cardboard.
How It Works
The name of this lighting style comes from the shape of the setup: one light above and one below the subject’s face, like the open shell of a clam.
Hence, place your main light slightly above and in front of the subject, angled downward at about 45 degrees.
The reflector should sit below the chin, angled slightly upwards to bounce light back into the shadows under the eyes, nose, and chin.
You can attach the reflector to something or have your subject hold it.
5. Rembrandt Lighting
And finally, the last portrait lighting technique every photographer should know:
Rembrandt lighting.
This technique is named after the famous Dutch painter and emulates a type of lighting he often used in his paintings.
Its most impotant characteristic is a small triangle of light under one eye of the subject; here’s an example:
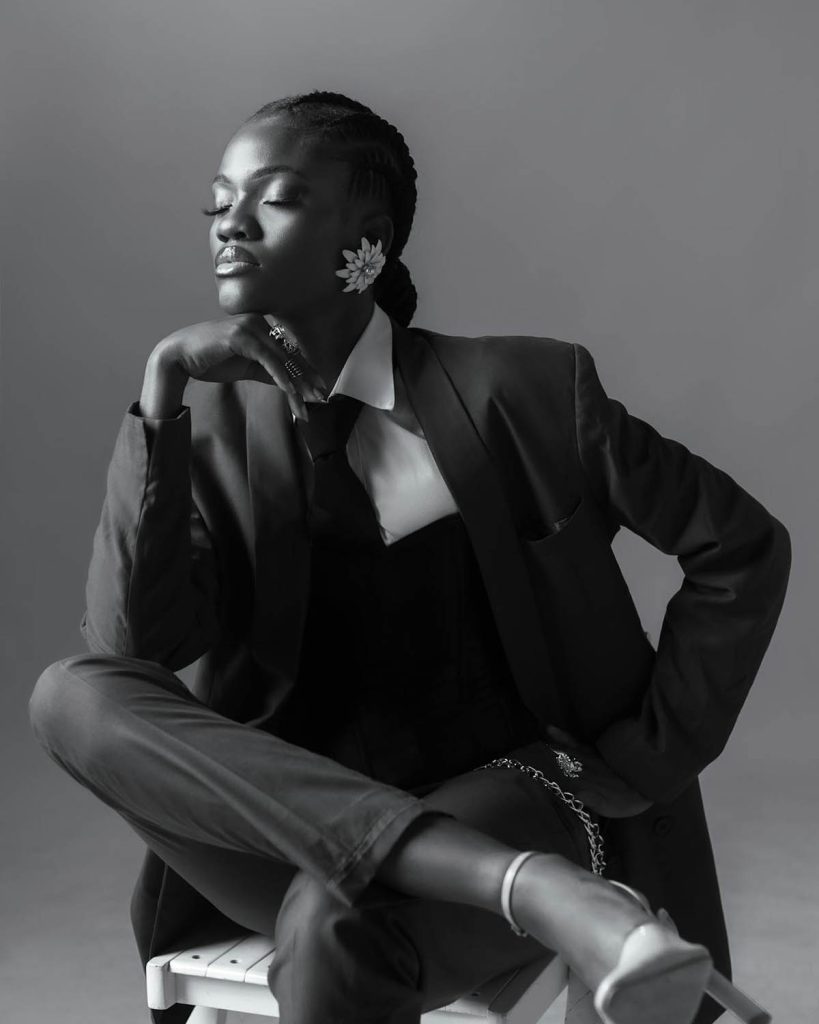
To compare, look at one of Rembrandt’s paintings where you can also see this triangle of light under the eye:

This is a really beautiful portrait lighting setup that creates quite a lot of volume and dimension in the face, making it perfect for character portraits.
I’ve actually written a whole post on Rembrandt lighting, which goes into a lot more detail and contains more information about gear and setup.
You can find it here.
Bonus: Choosing the Right Lighting Setup for Your Subject
With all these photography lighting techniques (split, Rembrandt, clamshell, etc.), it can be overwhelming to know which one to use.
If you’re unsure which lighting is best for your shoot, I suggest you let the subject and theme guide your decision.
For a dramatic or moody portrait, try split or Rembrandt lighting, as these will add intensity and depth.
For something more flattering and polished, try clamshell or butterfly lighting.
It also helps to consider the face shape, skin texture, and even the personality of your subject.
For example, clamshell lighting is amazing for highlighting someone’s beauty or glamourous vibe; split lighting is great for adding mystery or depth to character portraits, and so on.
Also, think about the emotion you want the image to convey.
Lighting isn’t just technical; it can really help you tell a story.
So, when choosing a setup, ask yourself:
What mood am I trying to create?
Then build your lighting around that intention.
Here’s a little chart you can refer back to when needed:
| Lighting Setup | Best For | Mood / Effect | Ideal Subjects |
|---|---|---|---|
| Butterfly Lighting | Beauty, Headshots, Glamour | Clean, flattering, symmetrical | High cheekbones, smooth skin, fashion |
| Painterly Lighting | Fine Art, Classic Portraiture | Soft, moody, dimensional | Story-driven portraits, timeless looks |
| Split Lighting | Editorial, Character Portraits | Dramatic, edgy, high contrast | Strong jawlines, moody or bold expressions |
| Clamshell Lighting | Beauty, Boudoir, Fashion | Soft, glowing, polished | Skin-focused portraits, close-ups |
| Rembrandt Lighting | Traditional, Cinematic, Fine Art | Dramatic but natural, sculpted | Most subjects, adds depth and storytelling |
And that’s it for portrait photography lighting techniques!
As you can see, these techniques are all pretty low effort and require minimal gear, meaning you can easily recreate them at home.
If you end up using one of them, please share your work with me on Instagram @desireesydow.photography; I would love to see it!
Finally, is there another portrait lighting technique you would like to learn? Let me know in the comments and I will include it in a future post!
Matching the light to the emotional intent before you touch the modifier. That shift in thinking changes everything. The technical setup becomes secondary to the story you’re trying to tell, and it shows in the work. A clean Rembrandt might be the right choice, or it might kill a shot that needs something softer.
I run a headshot and portrait studio called Lemon Shark in Fulham, and the number of clients who come in already thinking about ‘the setup they want’ rather than the feeling they’re going for is surprising. Once you reframe it as an emotional question first, the technical decisions usually sort themselves out.
Hi Emmet, I completely agree! It’s the reason I almost always start with the feeling or emotion I want to convey, and then lighting choices, etc are so much easier to determine as I know exactly what atmosphere I’m trying to achieve!! Thanks so much for reading and commenting!