
How to Become a Good Photographer
Are you wondering how to become a good photographer?
And what do you think it takes to improve your photography….is it technical knowledge?
The ability to capture special moments?
Or maybe many years of experience?
In my opinion, there are four qualities that all great photographers possess.
Keep reading to learn more about these four qualities and why they’re so essential for becoming a good photographer.
1.) Understanding Light
I’ve said it in a previous post, and I’ll say it again:
Without light, there’s no photograph.
As you may know, the word “photography” means “drawing with light” (derived from Greek).
Photographs carry their name because they are created by light hitting a light-sensitive surface, be it film, a camera sensor or even sun-sensitive paper, like when making cyanotypes.
Hence, light is an essential ingredient for creating any type of photograph, and if you ask me what makes a good photographer, then my number one answer is: understanding the fundamentals of light.
This is obviously a huge topic that can’t be covered in one blog post alone.
If you want to dive deeper, it may be worth booking a beginner’s photography course or buying a book on the subject.
However, I thought I’d sum up the most important aspects of light (and what they mean for your photography) below.
White Balance
White balance refers to the “colour temperature” of a light source – the relative warmth or coolness of white light.
For example, think of the light emanating from a small desk lamp with a Tungsten light bulb, which looks yellow/warm, as opposed to cold, blue-ish fluorescent light.
Why Does This Matter?
As a photographer, you’ll probably want to represent colours accurately in your images (unless you’re going for a creative effect).
To make sure this happens, digital cameras have an automatic white balance mode that colour corrects depending on the light source.
However, under certain light conditions, colours can actually look “wrong” in your photos because your camera can’t always accurately “guess” the colour temperature.
You can fix this by pre-selecting the correct white balance preset, for example, sunny, cloudy or fluorescent.
This way, the camera “knows” what you’re trying to capture and will adjust the white balance accordingly.
Alternatively, you can fix the white balance in Lightroom or Photoshop.
Type, Size and Position of the Sun/Light Source
Unless you’re a studio photographer and use artificial lighting, your main light source will be the sun.
If you’re taking photos outside or using window light, it helps to understand how the position of the sun and the time of day affect the light quality.
Most photographers will agree that the best time to take photos outside is within 1-2 hours of sunset or sunrise (“golden hour”).
At these times, the sun is lower on the horizon, and the rays come in at an angle, diffusing the light and making it soft and flattering.
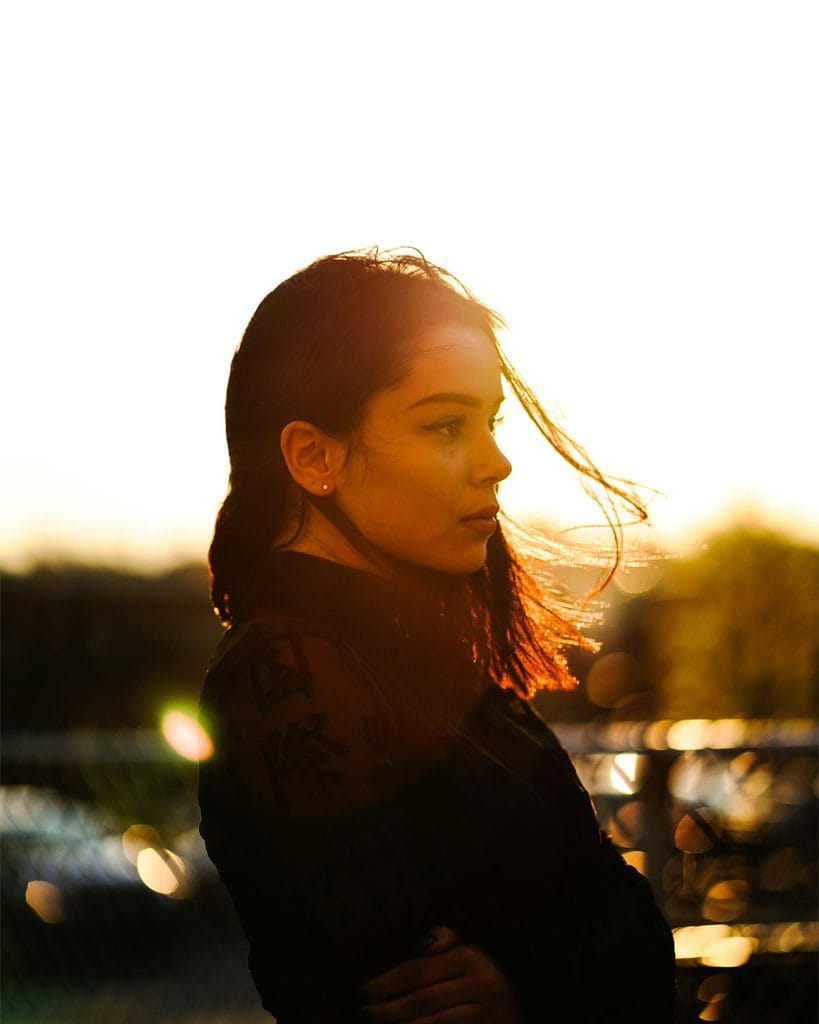
Photo taken during golden hour. Image credit: Guillaume Bolduc.
Conversely, you most likely want to avoid the harsher light around lunchtime, caused by the direct light shining down from the sun at its highest point.
This is especially true for portraits: direct sunlight creates unflattering shadows on the face and makes people squint.
Playing with the Position of the Sun
However, you can also play with the position of the sun intentionally in order to create certain effects.
For example, you could photograph people, buildings, etc, with the sun behind them for a beautiful backlit or silhouette effect, depending on the time of day.
Emphasising Shadows
You could also make shadows the subject of your photograph.
A good example is the strong shadows during lunchtime, when the sun is at its highest point:
This sort of light makes for striking black-and-white, high-contrast images.
Making Use of Overcast Days
And finally, it’s always worth taking photos on overcast days, too:
The clouds act as a giant softbox, diffusing the light. The result is very even, flattering light, which is perfect for portraits.
By the way, if you’re more interested in studio lighting, I’ve written some articles about building a DIY home studio if you’re on a budget, or the essential kit list for a home studio if you’re happy to invest in some gear.
Light As a Creative Tool
Light can also be used as a creative tool, influencing the mood or “vibe” of your picture.
This is done to great effect in cinematic photography – have a look at this article where I share more about the topic.
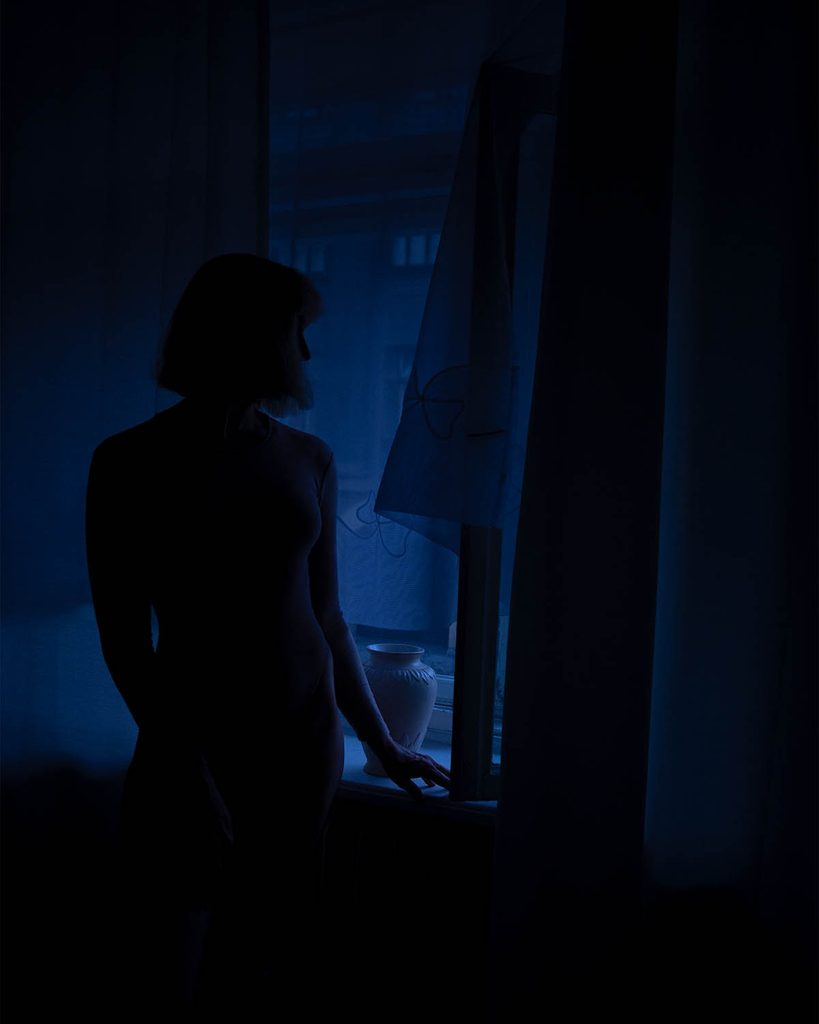
Cinematic self portrait, using the blue tones of light during the night as stylistic device.
Generally, if you want to create a certain atmosphere in your photographs, you can play with colour temperature and size of your light source; try using the following:
- Small bedside lamps
- Sunset lamp
- Coloured light bulbs/coloured gels
- Neon lights
- Fairylights
Generally speaking, use warm lights such as Tungsten light bulbs to create a “cosy”, warm atmosphere, and colder light such as flash or fluorescent light for a harsher, colder look.
Before I get to the next point…do you like taking portraits? Then check out my free ebook below:
Free Ebook: 50 Portrait Photography Ideas
If you need fresh inspiration for your portrait photography, download my e-book which contains 50 creative ideas and projects for portrait photography.

…but now, back to the blog post!
2. Know the Rules So You Can Break Them
My next answer to the question: “How to become a good photographer” is:
You have to understand the basic “rules” of photography.
Think of it like training to be an artist: usually, you start by learning the foundations of drawing, like drawing from life, composition and perspective.
Once artists have those basics down, they can start experimenting and breaking the rules to find their own style.
Of course, you could just buy a point-and-shoot camera and never bother with learning the basics of photography, but you’d be missing out.
I think you DO need to understand the foundations first, so you can get out of auto mode and create any picture you want without facing technical limitations.
The Foundations of Photography
So, what are those foundations?
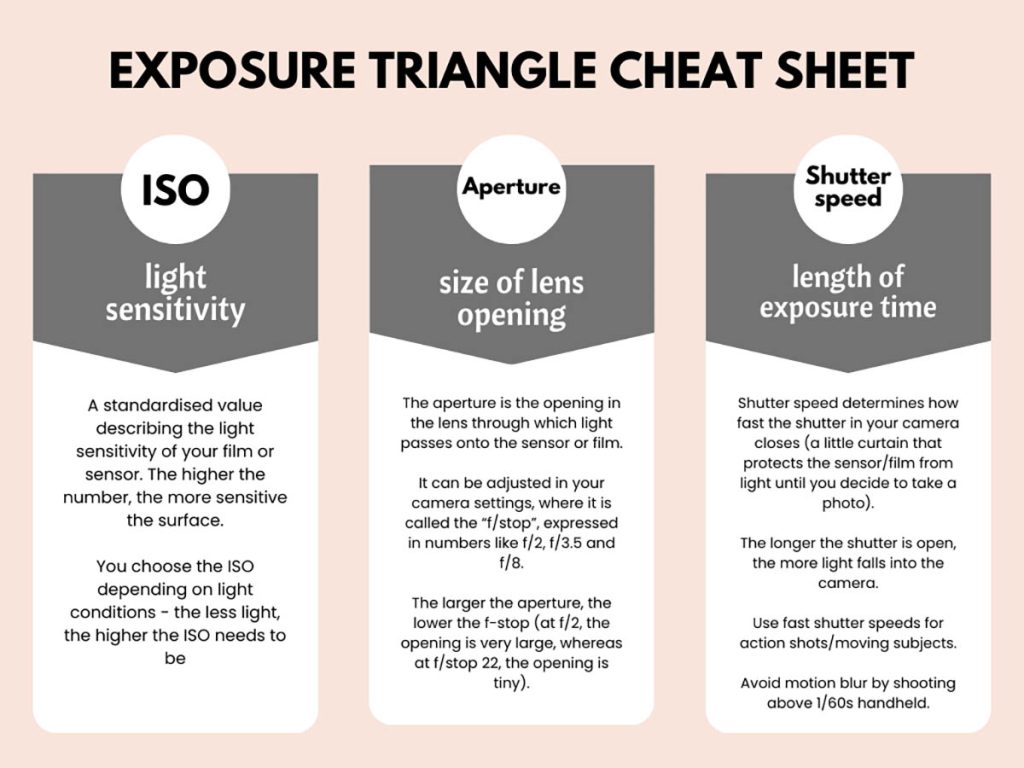
Well, every photographer should understand the exposure triangle consisting of ISO, aperture and shutter speed.
These three settings control how much light hits the film or sensor in your camera, as well as the sensitivity of that surface.
Let’s got through them one by one:
ISO
A standardised value describing the light sensitivity of your film or sensor. The higher the number, the more sensitive the surface.
You choose the ISO depending on light conditions – if you’re shooting outside on a bright sunny day, you can get away with the lowest ISO 100.
In contrast, in a dimly lit room inside, you may have to go up to a high value such as 1200.
(Just remember that the photo will get grainier the higher the ISO, so always choose the lowest ISO possible.)
Aperture
The aperture is the opening in the lens through which light passes onto the sensor or film (think of it like the pupil in your eye).
This opening can be adjusted in your camera settings where it is called the “f/stop”, expressed in numbers like f/2, f/3.5 and f/8.
Confusingly, the larger the aperture, the lower the f-stop (at f/2, the opening is very large, whereas at f/stop 22, the opening is tiny).
Depth of Field
The aperture is important because it controls depth of field, i.e. how much in your image is sharp or blurry.
For example, are you familiar with the “Portrait” mode in Apple iphones?
If you use it, portraits look very pretty because the face is in focus whereas the background is very blurry…like in this shot:
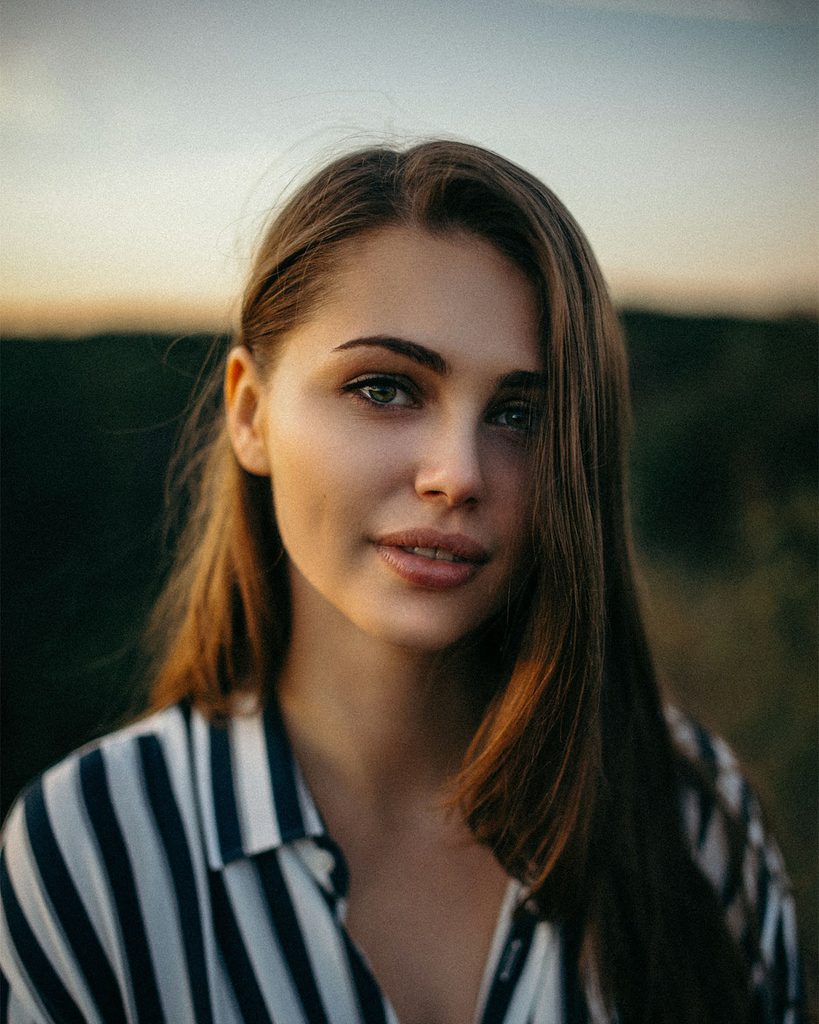
Portrait with shallow depth of field. Image credit: Štefan Štefančík.
If you wanted to do this with your camera, you would need to choose a very large aperture like f/3.5 or f/2.
This will give you a “shallow depth of field”, i.e. a very narrow area in which things appear sharp (and the rest is blurry).
If, on the other hand, you wanted to take a photo of a landscape where you want everything to look sharpish, you would need to choose a narrow aperture like f/13.
This will give you a deeper depth of field (keeping most things in the frame in equal focus).
(I explain aperture and depth of field in detail in this post).
I promise to keep this blog completely ad-free so you can read without distractions. If you want to support my work, buy me a coffee: It’s a small gesture that makes a big difference!
Shutter Speed
Shutter speed determines how fast the shutter in your camera closes (a little curtain that protects the sensor/film from light until you decide to take a photo).
Logically, the longer the shutter is open, the more light falls into the camera.
Important things to know about shutter speed:
- Choose a fast shutter speed for moving subjects, like animals – around 1/250 and up.
- If you’re holding your camera (as opposed to using a tripod), avoid blurry images by keeping your shutter speed at or above 1/60 – if it’s slower, the camera will pick up your hand movement, causing motion blur.
It’s really worth taking a photography course or buying a good book on the topic so you can dive deeper into the exposure triangle.
You can also check out my in-depth post on shutter speed and ISO here.
It all seems a little complicated at first, but it becomes second nature very quickly, and it’s so satisfying to stop using auto mode and setting the desired values manually.
The reason it’s so important to understand these foundations is that you can then not only take a well-exposed photograph, but also eventually break free from the rules and express yourself creatively.
Of course, you don’t HAVE to know all this – theoretically, you could just always shoot in auto mode and still achieve some cool photos.
However, you will quickly notice that you run into limitations if, say, you don’t know how to get a blurry background or to use a slow shutter speed.
That’s why I think that if you want to be a good photographer, it’s essential that you familiarise yourself with the exposure triangle and really get to know your camera.
Here’s a quick summary of the exposure settings:
3.) Understanding Storytelling
What else makes a great photographer?
In my eyes, it’s the ability to tell a story through pictures.
This may sound confusing – after all, photographers are not writers, and in many cases, photographs are taken to document reality, e.g. a photo of a beautiful flower – what does that have to do with storytelling?
Well, I would argue that most genres of photography do involve a narrative element, be it wedding photography, documentary photography, portrait photography, street photography or fine art photography.
Examples might be:
- A wedding shot behind the scenes, showing the hands of the bride and groom exchanging rings
- A street photography scene juxtaposing a lonely old person and some cheerful kids playing
- A portrait of someone holding a meaningful prop
Good photographers know that simply depicting reality can be a little dull; it’s way more interesting to develop a visual narrative that captivates the viewer and makes them wonder about the subject in the photograph.

Portrait with storytelling aspect. Image credit: Sinitta Leunen.
How to Apply This to Your Own Photography
Next time you take some pictures, try to find a story or narrative that you can incorporate into your picture.
This could be driven by emotions, like sadness or joy, but also by humour, e.g. a funny street scene.
Think about it like a piece of writing:
- Who is the “main character” of the image – a person, an animal, an object?
- What are they doing/not doing?
- What emotion do you want the viewer to feel about the character or the scene? Wonder, puzzlement, surprise, happiness, shock, amusement, etc?
The story you’re trying to tell doesn’t have to be complicated at all – “man sitting on a park bench feeding the pigeons” is a story already!
However, you can of course make it more complex and really try to incorporate symbolism or universal ideas and concepts (this works particularly well with still life photography, using props such as feathers, skulls and flowers).
If you’re interested in taking more cinematic photos based on storytelling, you might like my cinematic photography email prompts below:
Free 7-Day Cinematic Portrait Email Challenge!
Do you want to master cinematic portrait photography in seven days? Then sign up for my free email challenge with a different prompt every day!

Taking Photos With Intention
The most important thing about storytelling in photography is taking your photo with intention.
Before you press the shutter button, be clear on what narrative you’re trying to capture.
Always think – what is the purpose of this image, and why do I want to capture it?
One last tip for storytelling in photography:
Always focus on the essentials and try to frame your shot so your message becomes clear.
For example, shoot subjects in front of a plain backdrop; shoot in black and white to remove distracting colours, or crop out distracting details in post-production.
4.) Willingness to Learn and Expand
The very last, but perhaps most important tip for anyone wondering how to become a good photographer: you will need the willingness to continuously learn and expand.
It’s easy to get very comfortable with a certain photographic style or sticking to specific camera settings.
However, the only way photographers become better is by expanding their skill set, experimenting and challenging themselves.
Therefore, my last tip for today is to keep reading books about photography, looking at different photographers’ work, going to exhibitions, trying out new kit and exploring your camera’s settings in order to continually evolve as a photographer and develop your own style.
And that’s it for today’s post!
Here’s a quick summary of all the four qualities a good photographer needs:
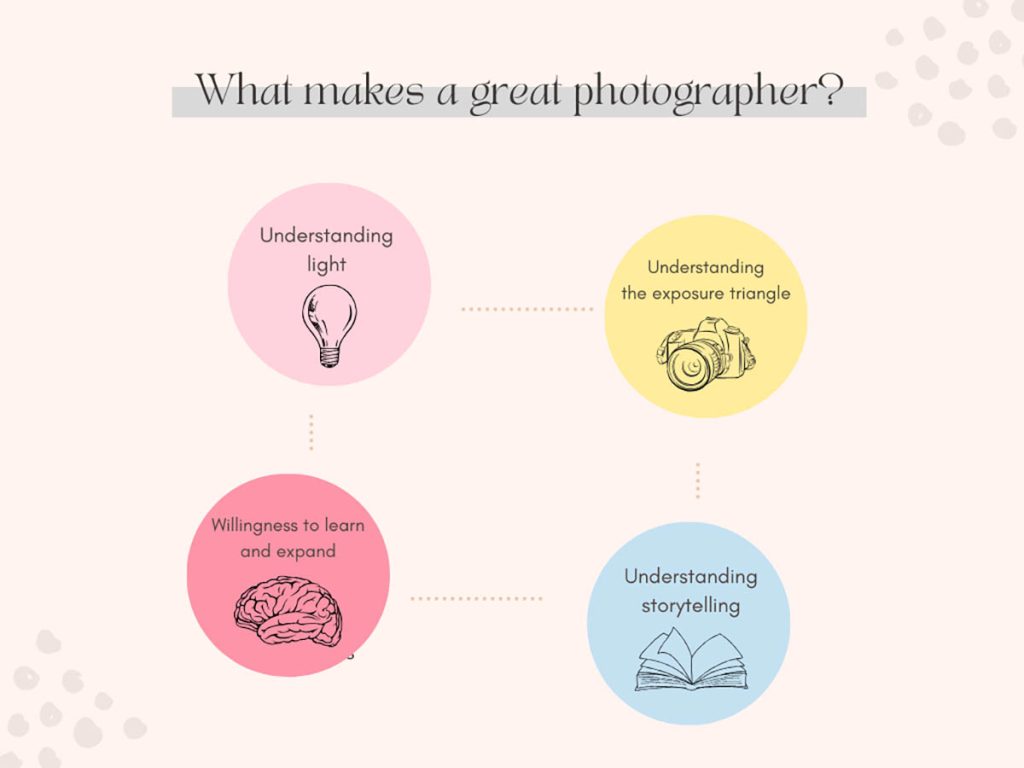
Which of these resonates the most with you? Let me know in the comments!